Disclaimer: I am a consultant at Amazon Web Services, and this is my personal blog. The opinions expressed here are solely mine and do not reflect the views of Amazon Web Services (AWS). Any statements made should not be considered official endorsements or statements by AWS.
In this post, you will learn how to install MySQL on an Amazon Linux EC2 instance. You will also learn, how to configure it to accept remote connections, so that you can connect MySQL server running on an EC2 from any other remote server or local machine.
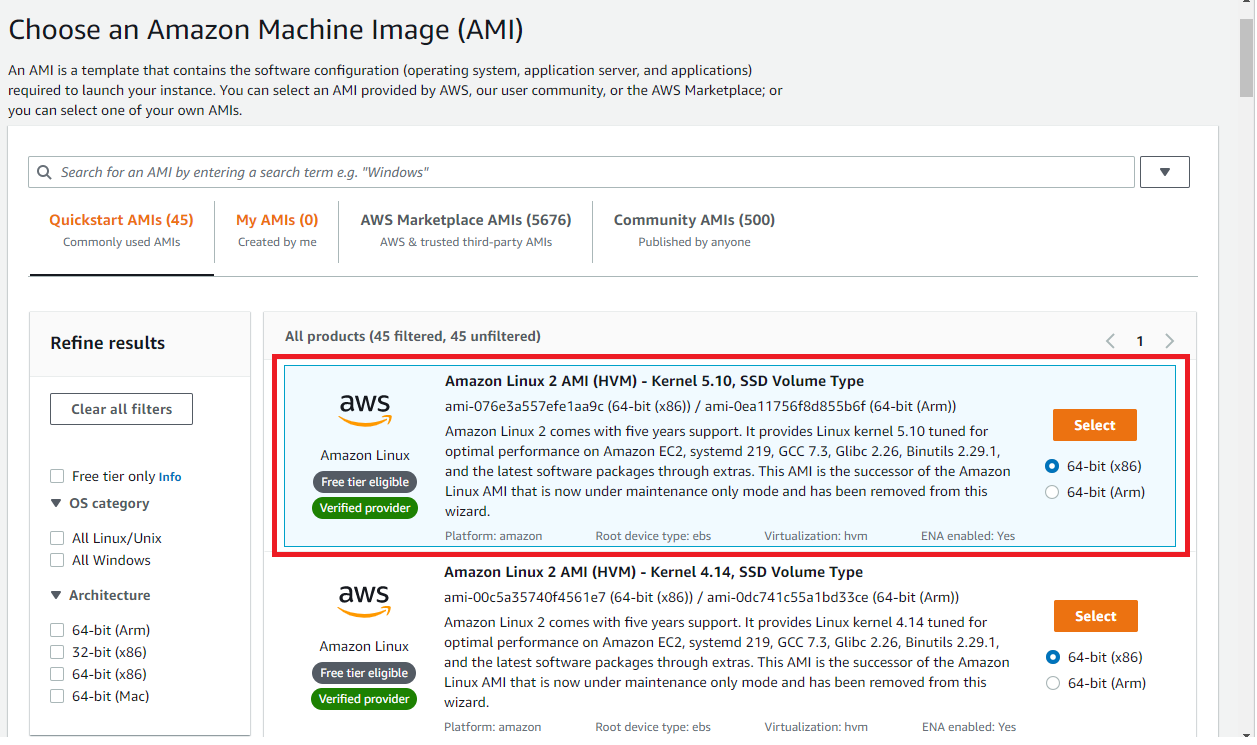
In the first step, you have to create an Amazon Linux 2 EC2 instance. Though, in this post, we won't focus much on creating a Linux EC2 instance step by step. But there are certain things that you must know while provisioning the EC2 instance.
Select the Amazon Linux 2 AMI as shown in the below picture. For CPU architecture, you can choose either x86 or ARM. In this post, I have chosen x86 as ARM instances were not available in t2 or t3 instance family.
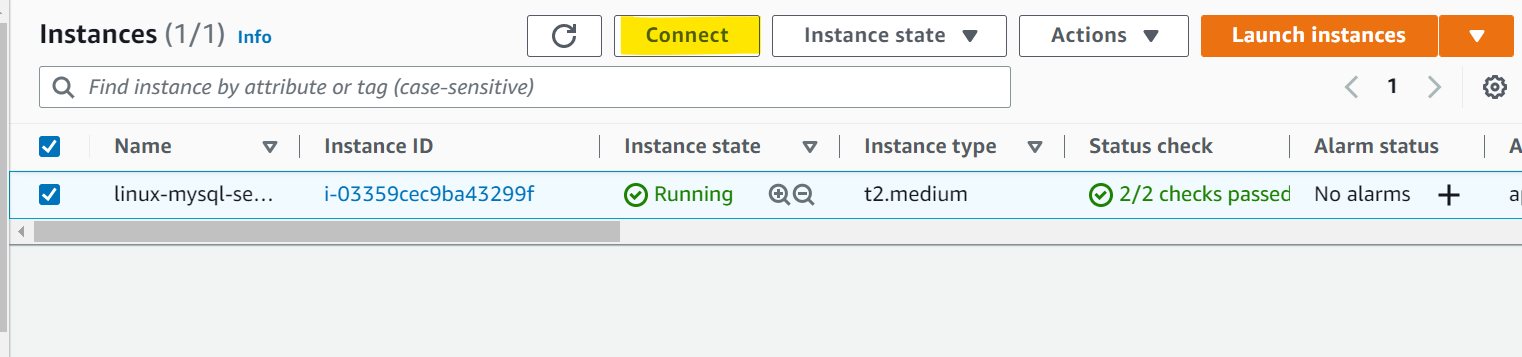
Now that the Linux EC2 instance has been created. The next step is to establish an SSH connection with this instance.
Simply click the Connect button as seen in the photo below, and you will be presented with a few choices.
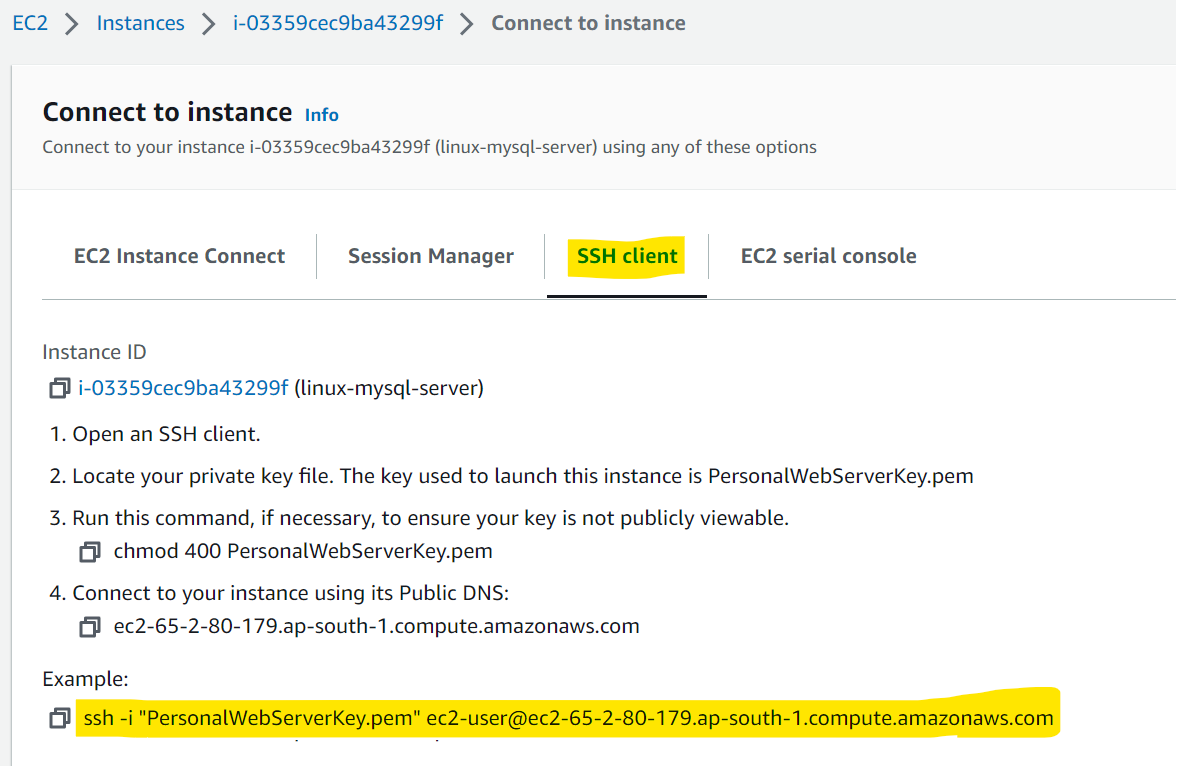
Select SSH client tab and copy the command highlighted below.
To connect with the Linux instance, issue the command in Bash or the Command Line. The <private-key>.pem file that you might have generated during the EC2 creation is also necessary for this command.
Now that you have established an SSH connection with the Linux EC2 instance, it's time to install the MySQL server.
We're going to install MariaDB (a fork of MySQL) because Amazon's documentation appears to recommend it over MySQL. Because MariaDB is a fork of MySQL, it supports the same features as MySQL while also adding new ones.
To install MySQL, run the commands listed below one by one. I've added enough comments before each command to make it self-explanatory.
#  this command updates all packages to the latest version
sudo yum update -y

# this command installs MySQL server on your machine, it also creates a systemd service
sudo yum install -y mariadb-server

# this command enables the service created in previous step
sudo systemctl enable mariadb

# this command starts the MySQL server service on your Linux instance
sudo systemctl start mariadb

# this command helps you to set root user password and improve your DB security
sudo mysql_secure_installation
The final command, sudo mysql_secure_installation prompts you with a few questions, which may appear as shown below.
# Here, just hit enter as we have not set any password yet
Enter current password for root (enter for none):

# Here, reply with Y
Set root password [Y/n]

# Enter new password
New Password:

# Re-enter new password
Re-enter new Password:

## Say Y
Remove anonymous users? [Y/n]

## Say Y
Disallow root login remotely? [Y/n]

## Say N, as we would need them for verification
Remove test database and access to it? [Y/n] y

## Say Y
Reload privilege tables now? [Y/n] y
Now that you've installed MySQL server on your EC2 instance, it's time to make sure it's working properly and you are able to connect to it. So, let us begin the verification process.
To connect to the MySQL instance, run the following command.
mysql -h localhost -u root -p
Once connected, run below command.
SHOW DATABASES;
It should print the names of all the test databases. If this prints, we can assume that the MySQL server installation was successful.
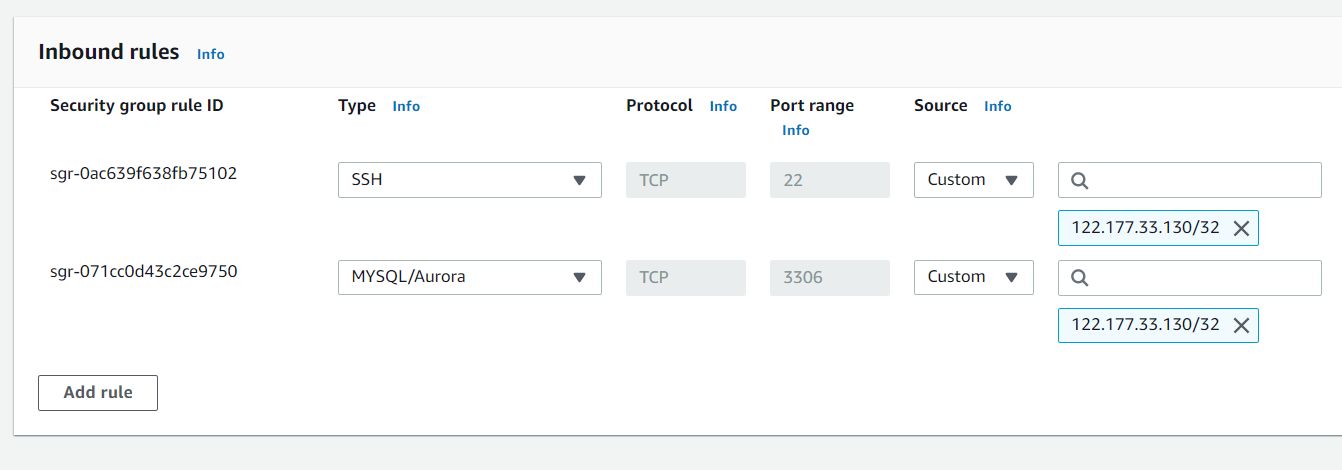
The MySQL server is currently only accessible within the EC2 instance. However, if you want to connect to this MySQL server from your local machine or another server, you must configure it to accept remote connections.
Follow the steps below to configure MySQL to accept remote connections.
cd / to go on the root directory.sudo nano /etc/my.cnf to open my.cnf file in the nano editor.bind-address=0.0.0.0 line as well.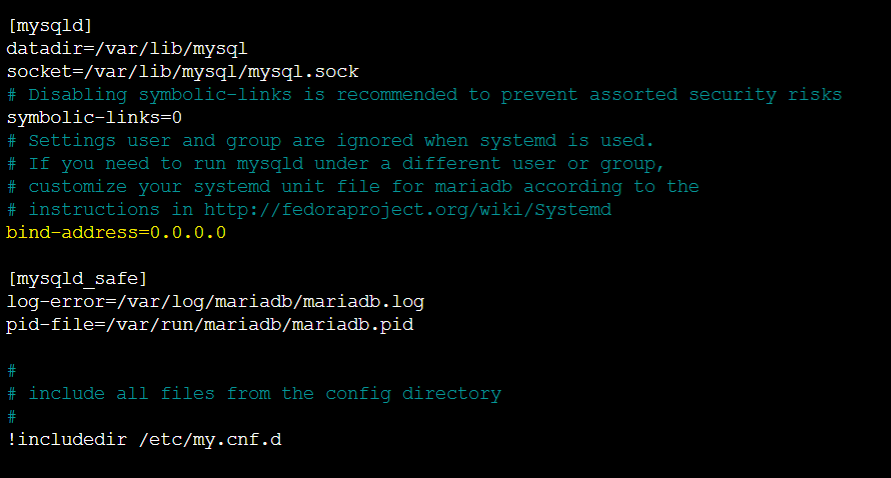
sudo systemctl restart mariadb to restart the service.root user.
CREATE USER 'ankush'@'localhost' IDENTIFIED BY 'ankushpassword';

CREATE USER 'ankush'@'%' IDENTIFIED BY 'ankushpassword';

GRANT ALL PRIVILEGES ON *.* to ankush@localhost IDENTIFIED BY 'ankushpassword' WITH GRANT OPTION;

GRANT ALL PRIVILEGES ON *.* to ankush@'%' IDENTIFIED BY 'ankushpassword' WITH GRANT OPTION;

FLUSH PRIVILEGES;

EXIT
ankush and password as ankushpassword.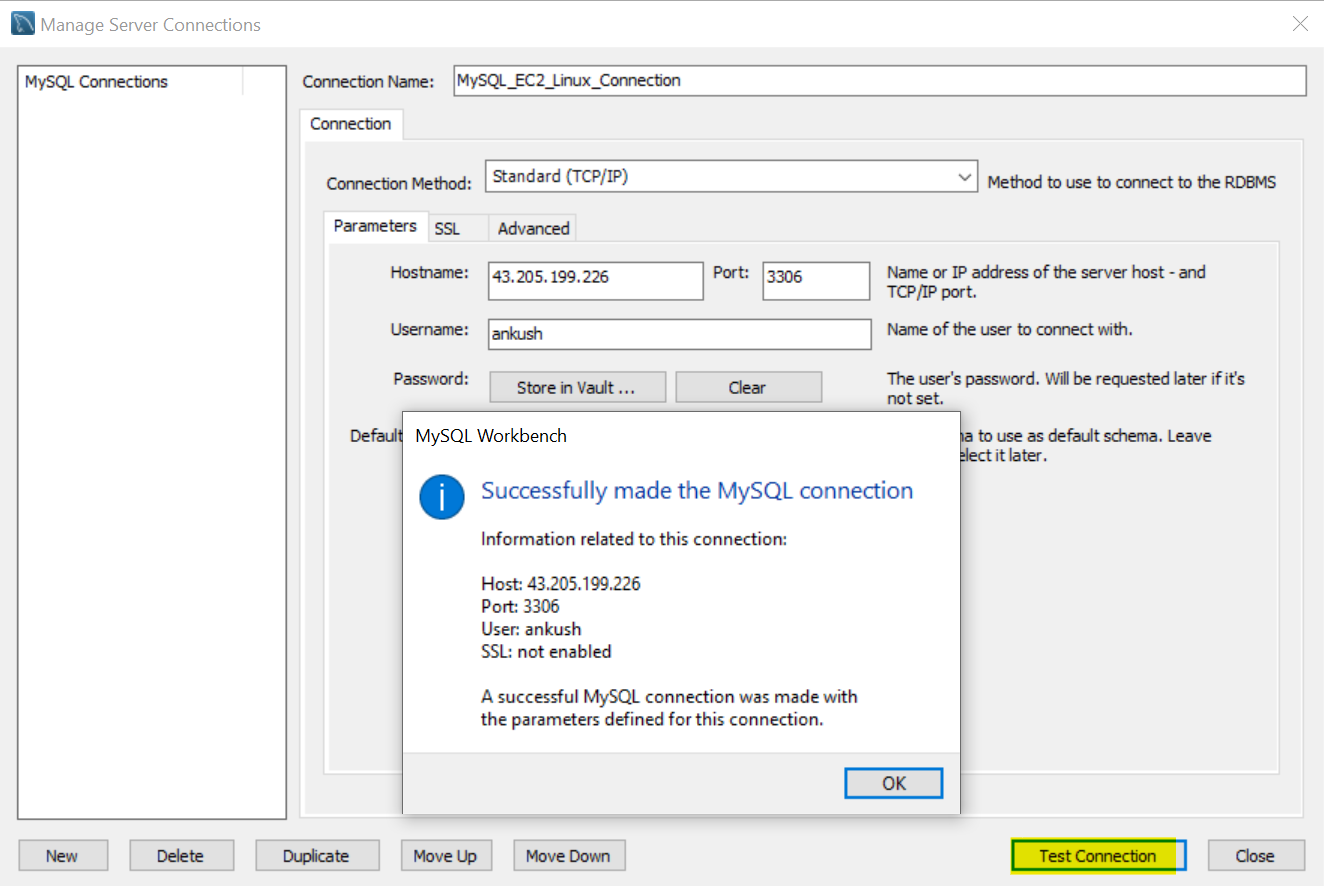
In this post, we learned, how to run MySQL server on an Amazon Linux 2 EC2 instance, as well as how to configure it to accept remote connections. Please share your thoughts and feedback in the section below.
Thank You ❤️