Disclaimer: I am a consultant at Amazon Web Services, and this is my personal blog. The opinions expressed here are solely mine and do not reflect the views of Amazon Web Services (AWS). Any statements made should not be considered official endorsements or statements by AWS.
In this post, we will understand how can we enable the user to log in with their work, school, or personal Microsoft account or Azure Active Directory account using ASP.NET Core.
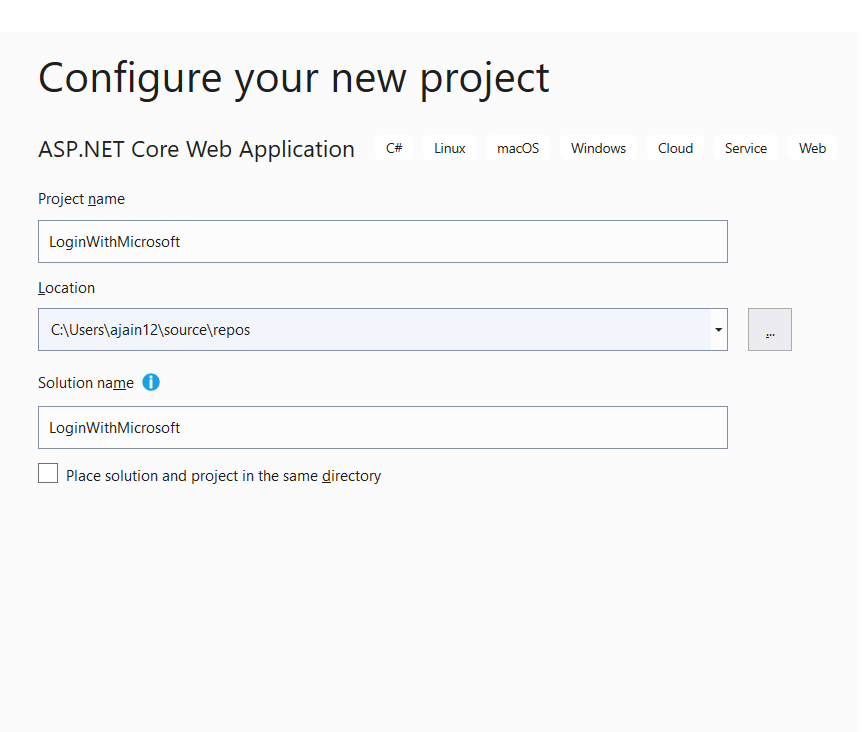
Step 1: Create a new ASP.NET Core web application project in Visual Studio 2019.
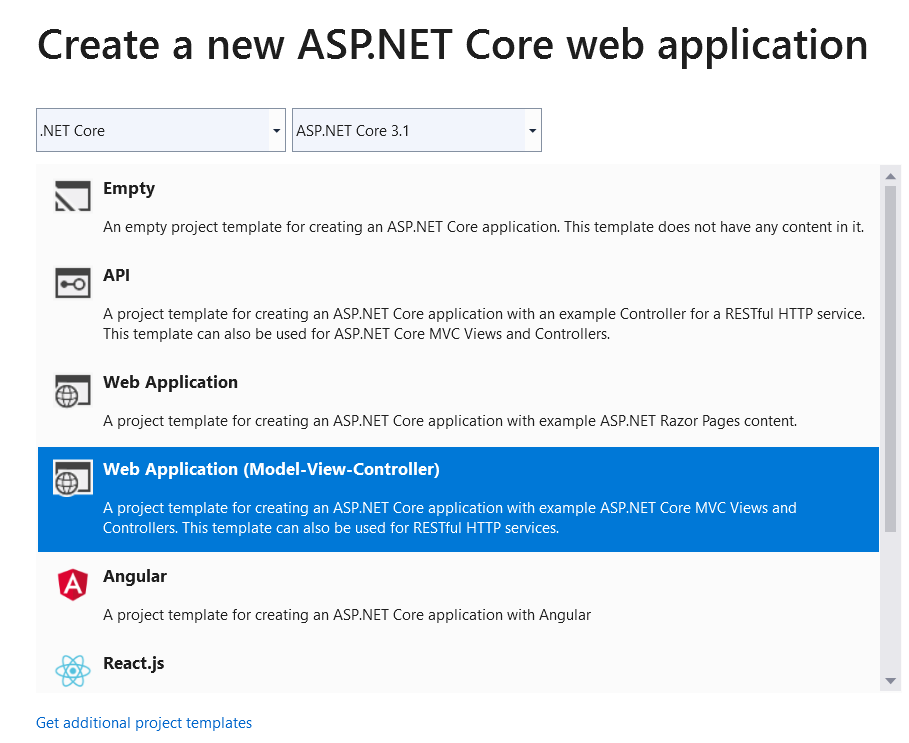
Step 2: Select ASP.NET Core 3.1 MVC application from the available templates as shown below.
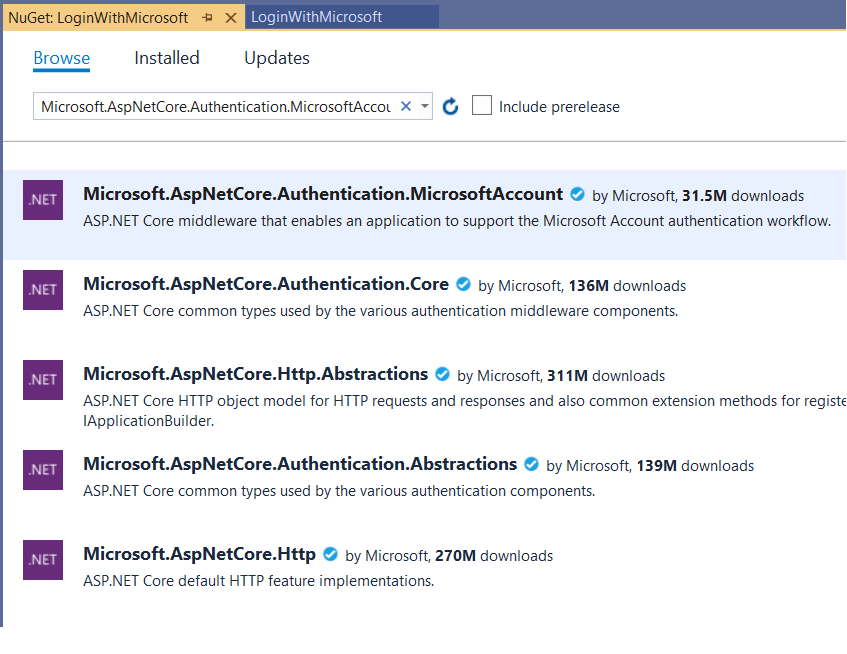
Step 3: Install Microsoft.AspNetCore.Authentication.MicrosoftAccount NuGet package.
Step 4: Open Startup.cs file and copy below code in ConfigureServices() method.
Here, we have used 2 authentication schemes for implementing login with Microsoft functionality, you can go with either.
- Scheme 1: Generic Authentiction Scheme using
AddOAuth()method.- Scheme 2: Microsoft Authentiction Scheme using
AddMicrosoftAccount()method.
Cookie Authentication Scheme is our default authentication scheme, that is configured to redirect the user to the /Account/Login page once the request is found as unauthenticated.
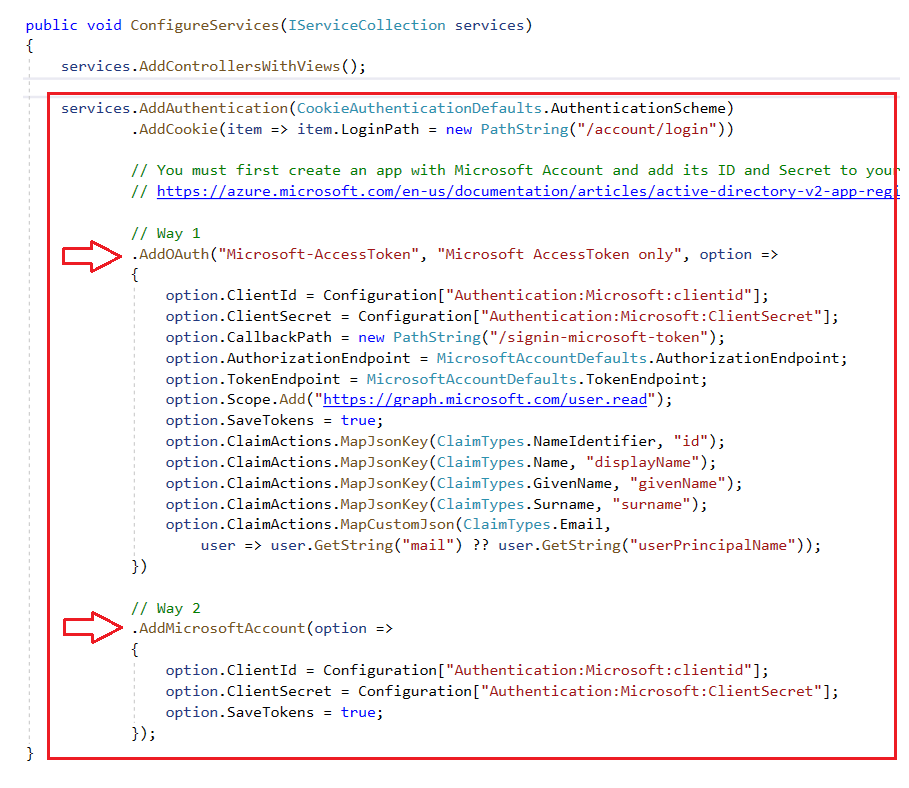
Copy the above image's code from here:
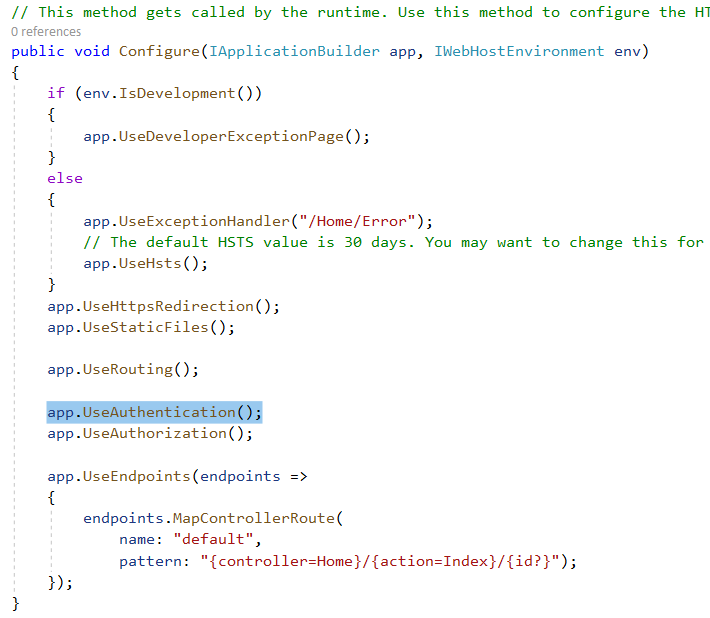
Step 5: Go to Configure() method in the same Statup.cs file, and add app.UseAuthentication() as shown below. This enables the authentication in the request pipeline.
Step 6: Now go to the Azure portal and register an application. Refer to this post to learn how to create an app in Azure AD.
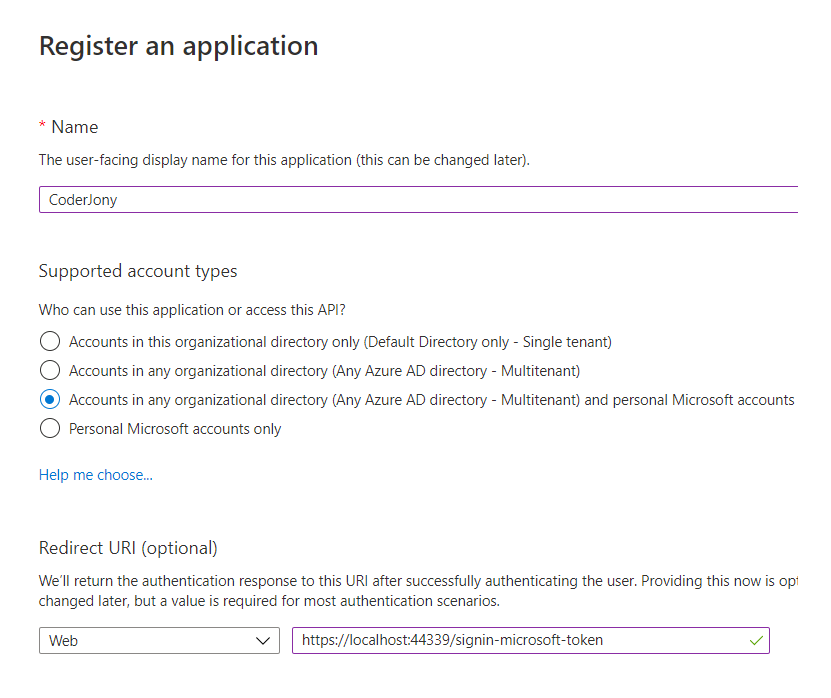
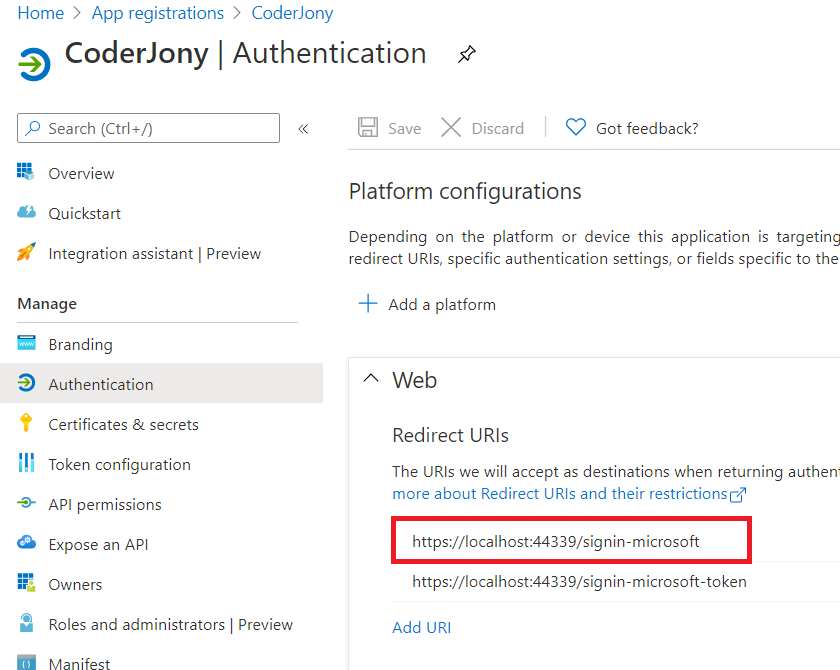
AddOAuth() method, then for Redirect URI, use the CallbackPath value that you defined above. As we have used /signin-microsoft-token as CallbackPath so the URL should be like https://localhost:44339/signin-microsoft-token.AddMicrosoftAccount() method, then we must use/signin-microsoft in Redirect URI, so the URL should be like https://localhost:44339/signin-microsoft. The Microsoft auth flow is configured to handle the request to this URL /signin-microsoft.See, we have added both URLs here, so that code could work with both the schemes.
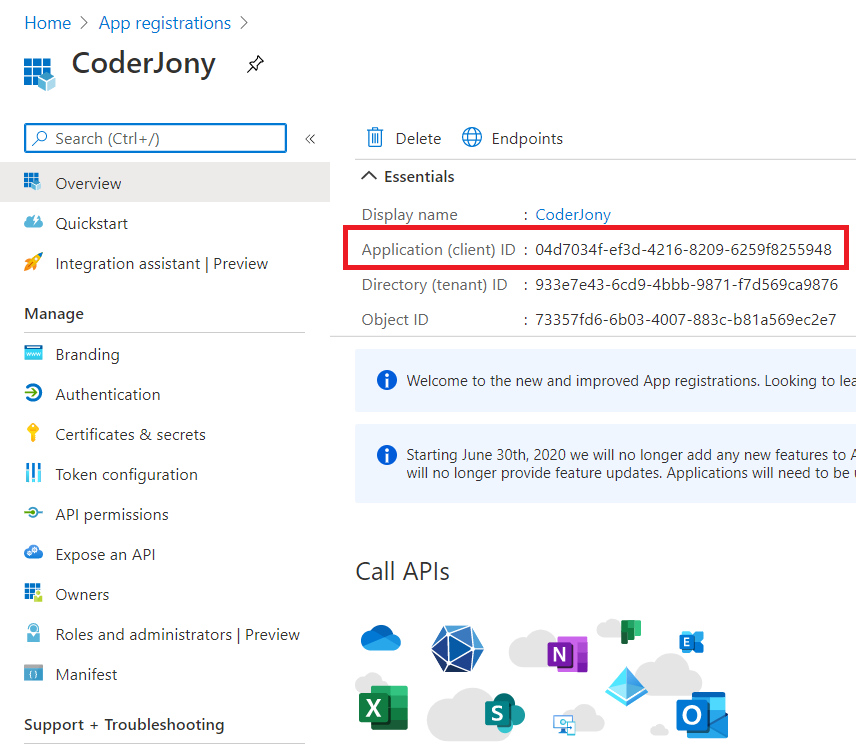
Step 7: Copy the Application Id, we will use it as Client Id in our code.
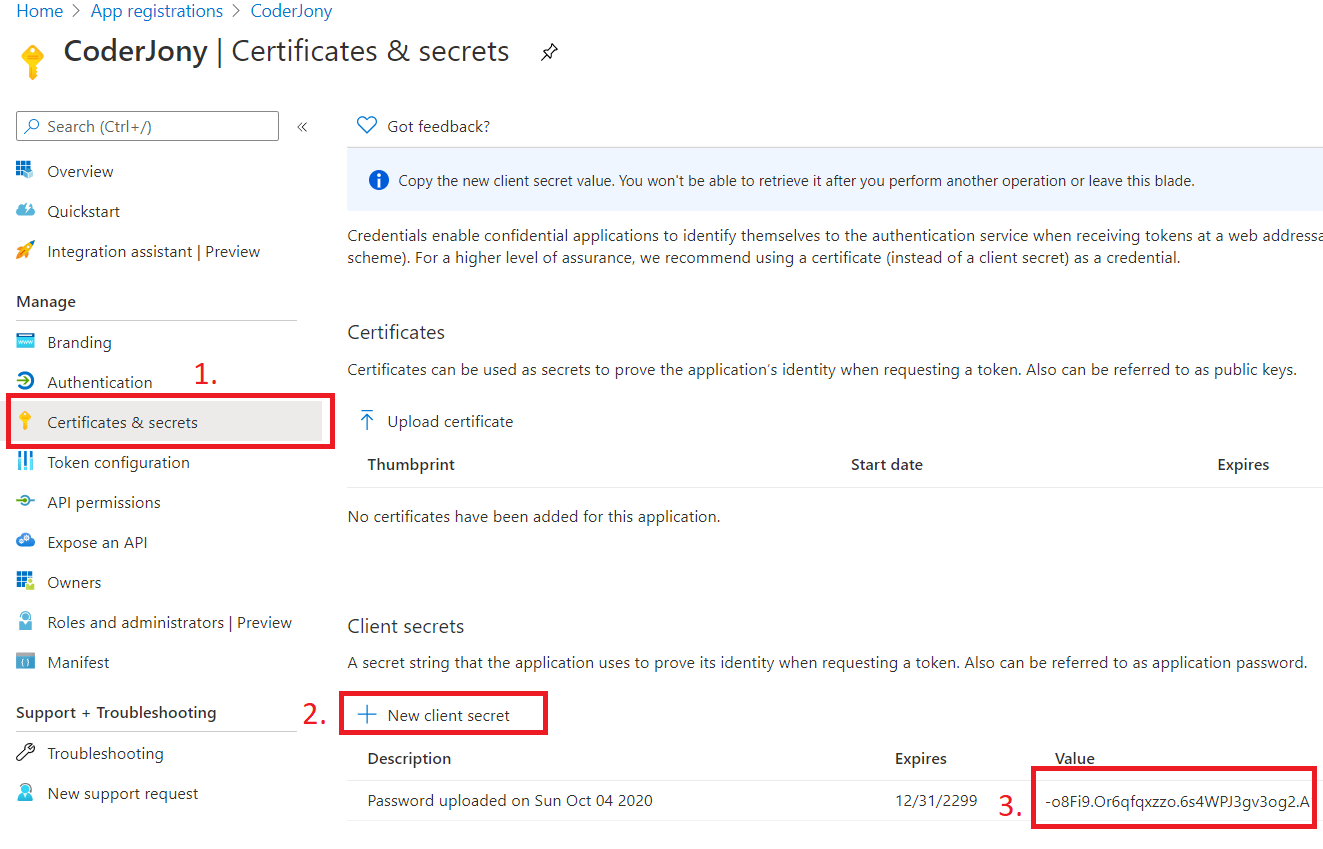
Step 8: Go to Certificates & secrets blade, generate a secret, and copy it as well. We will be using it as Client Secret in our code.
Step 9: Go to the appsettings.json file and add the Authentication block as shown below.
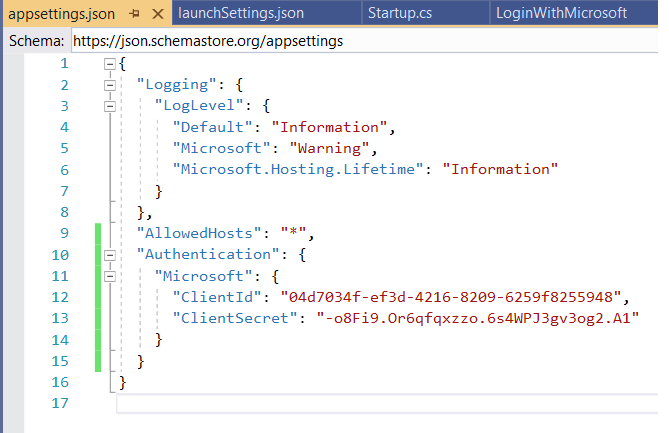
Copy the above image's code from here:
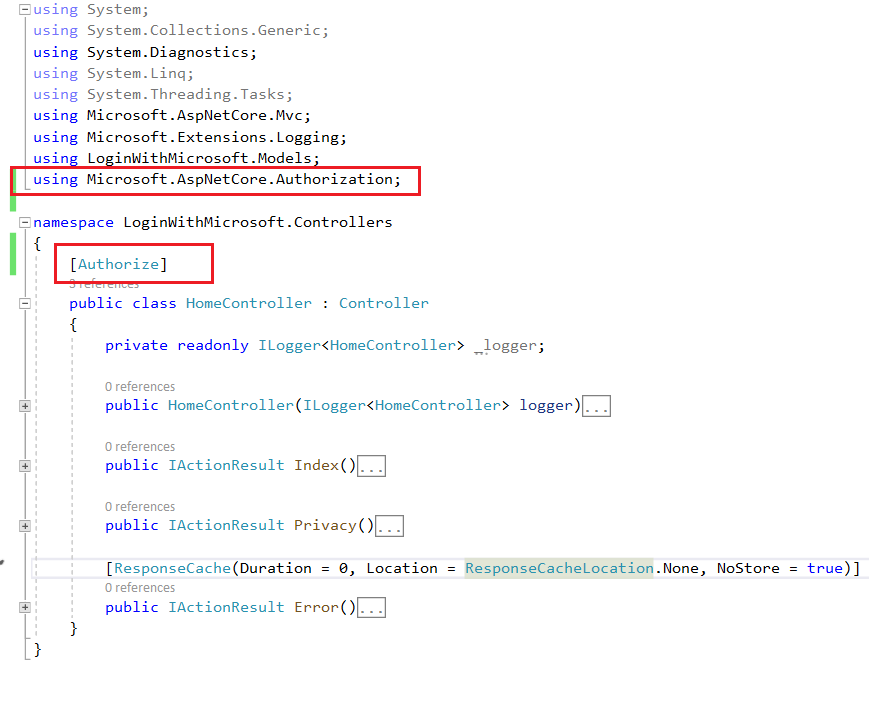
Step 10: Add Authorize attribute on Home Controller to allow secure access only.
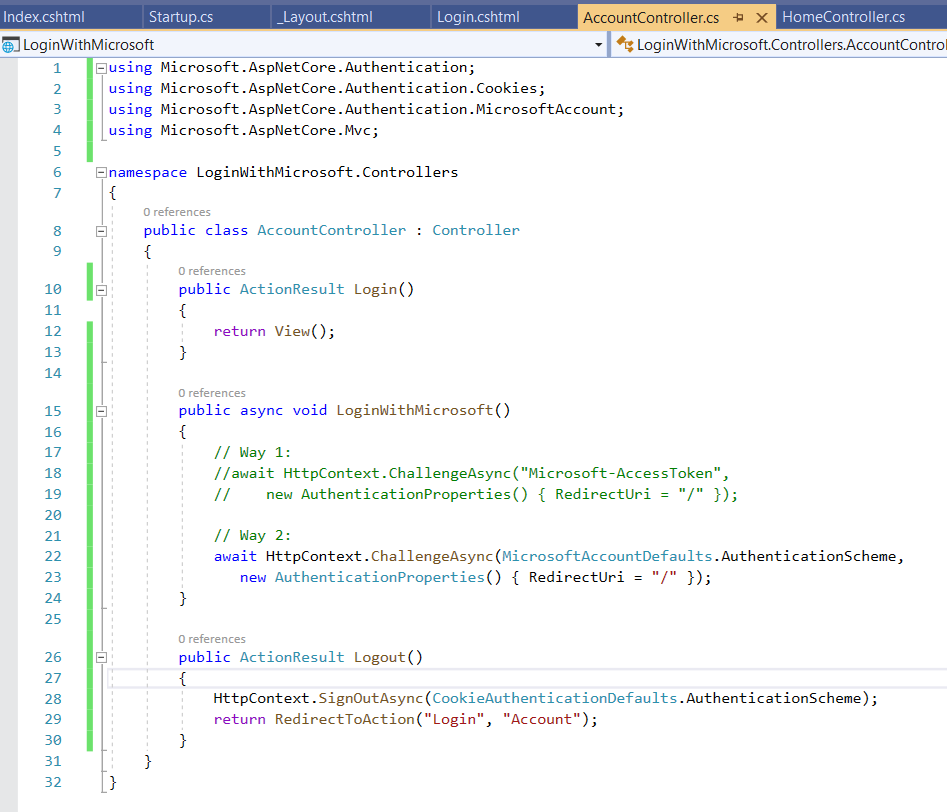
Step 11: Now, we create an Account Controller and create 3 actions over there.
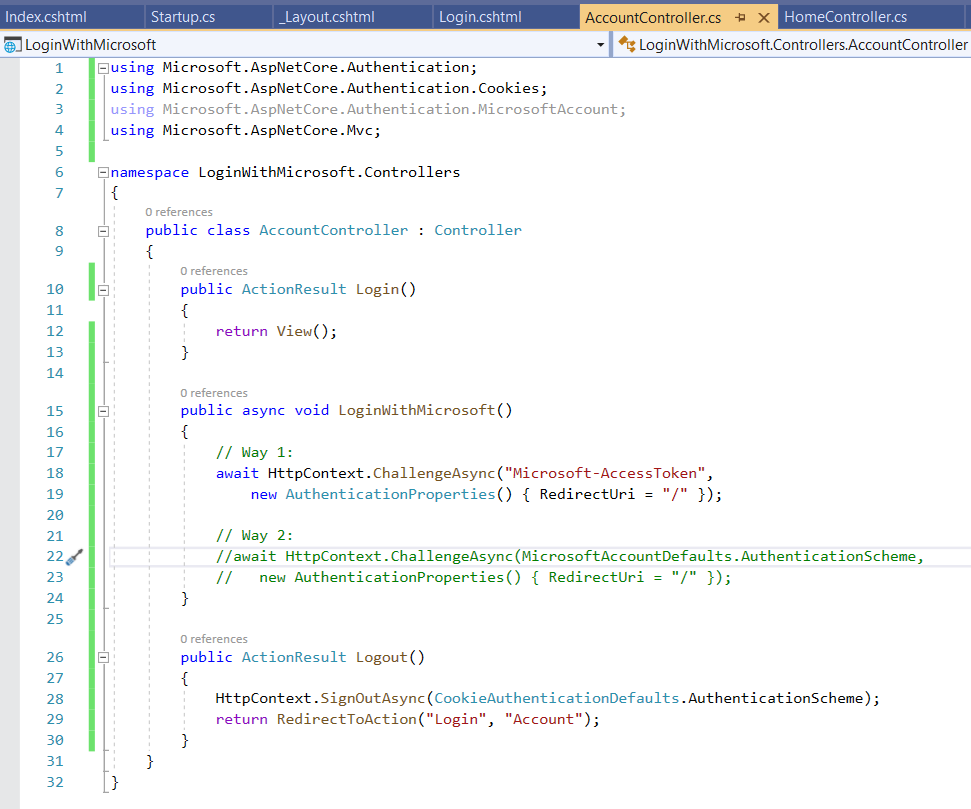
Step 12 - Comment out the code for the scheme that you don't wish to continue. We have written code for both the schemes for this demo. In the real-world scenario, you won't be using 2 schemes for the same third-party login.
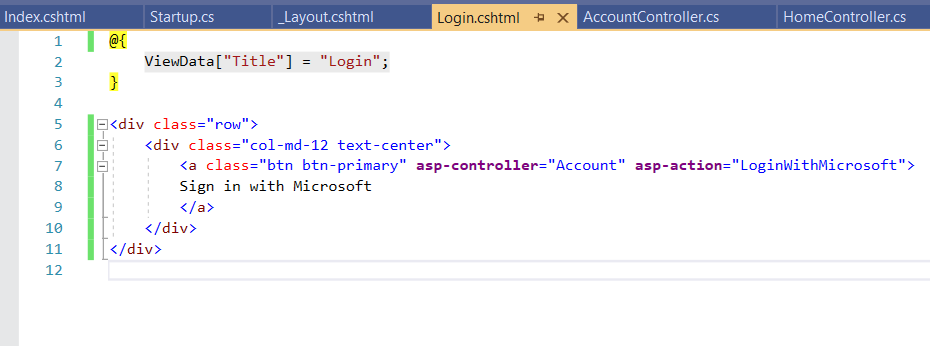
Step 13: Here is the Razor view for the login page.
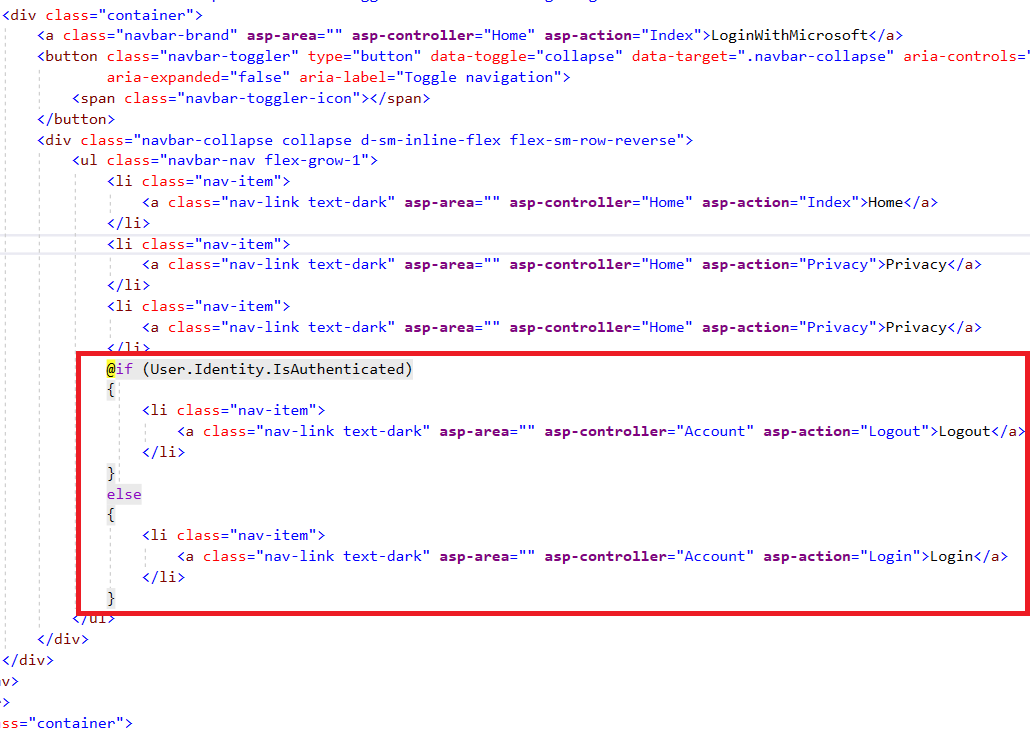
Step 14: On Layout, we have used User.Identity.IsAuthenticated property to check if the user is logged in or not and accordingly showing buttons for Login and Logout.
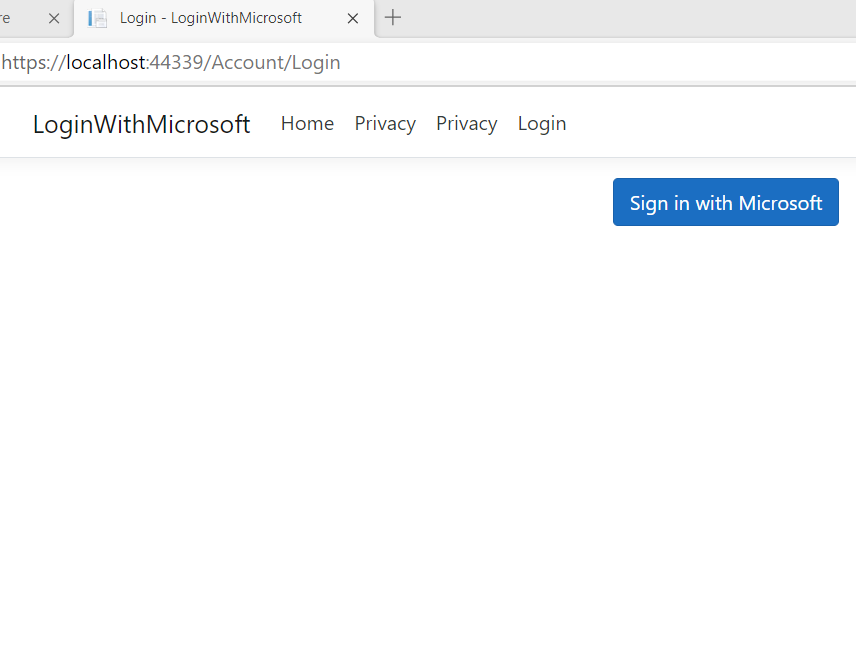
Step 15: Run the application, this will redirect you to /Account/Login page. There you will see a button to log in.
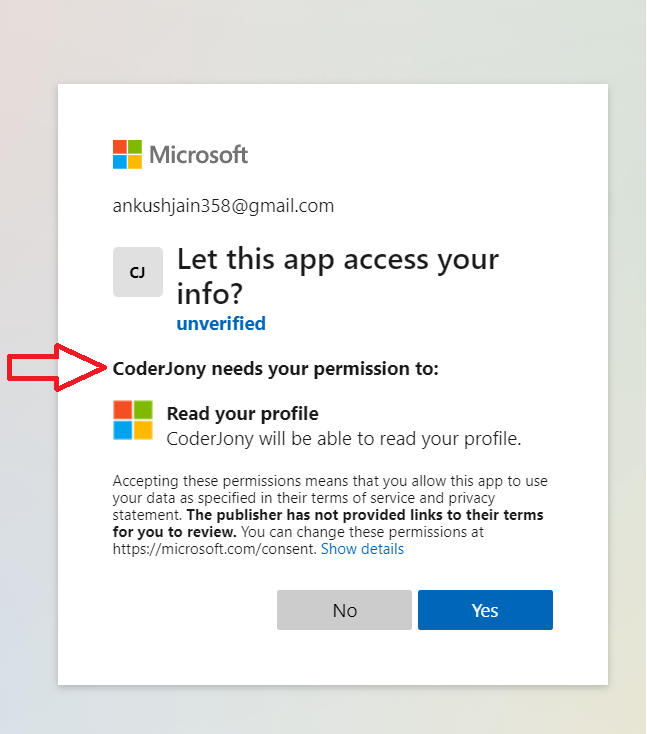
Step 16: Clicking on the above button/link will take you to the LoginWithMicrosoft action of the Account Controller, and that further will redirect you to the Microsoft login page. There, you will be shown a consent page like below.
Step 17 After the consent is granted, you will be again taken to your application, where all the information will present in the User.Identity property.
Behind the scenes
Behind the scenes, after successful authentication, Microsoft redirects the user to the Redirect URI that we mentioned in the app. NuGet package used above internally intercepts the request for that URI, retrieves the code from there, and gets an access token by calling MS Graph API. Once the access token is received, another graph API is invoked to get the user's basic profile information. All this user information is then deserialized and set into the
User.Identityproperty.
You can get the user's email id from the User. Identity property and check if the user is present in the database or not, and create a new one if it is not there.
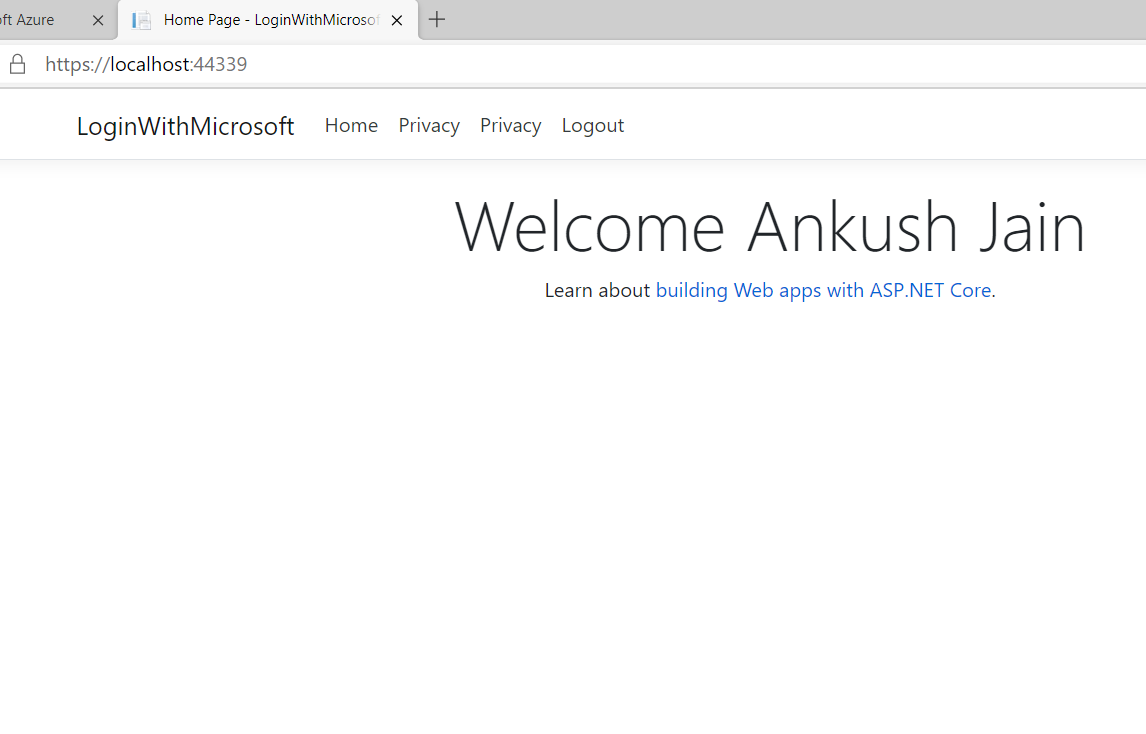
This way, we can enable users to login with their Microsoft or Azure Active Directory account into our application.
Code for the demo is available at GitHub - ankushjain358/Login-with-Microsoft-ASP.NET-Core-3.1
Happy Coding 😍

