Disclaimer: I am a consultant at Amazon Web Services, and this is my personal blog. The opinions expressed here are solely mine and do not reflect the views of Amazon Web Services (AWS). Any statements made should not be considered official endorsements or statements by AWS.
In this post, we will understand how can we create a NuGet package using Visual Studio 2019. Also, we will understand, how to deploy this package to Nuget.org to make it available to the rest of the world.

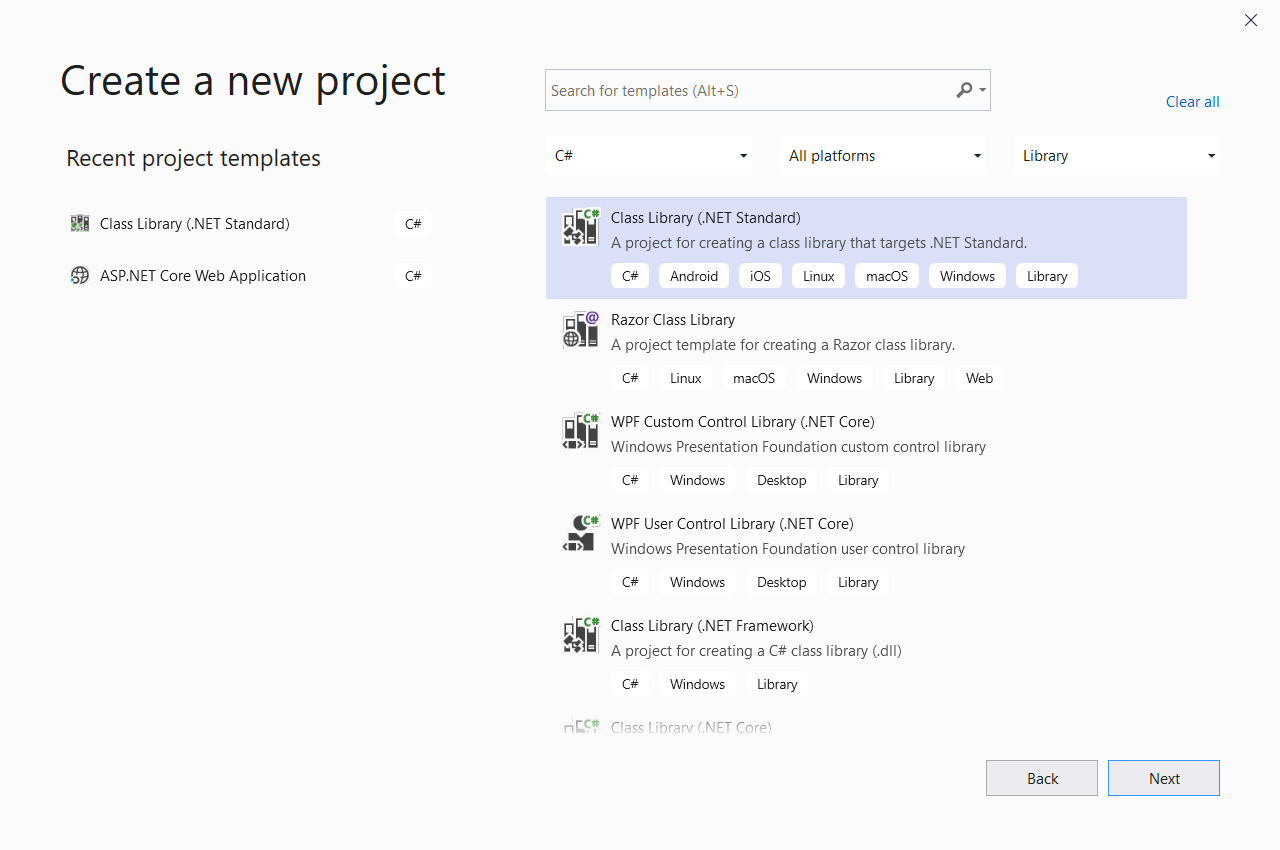
Step 1: Open Visual Studio 2019 and create a Class Library (.NET Standard) project.
Note: We should choose .NET Standard for creating Class Library projects. The reason being, libraries created using .NET Standard can be used by all major platforms such as .NET Framework, .NET Core, Mono, Xamarin or Unity.
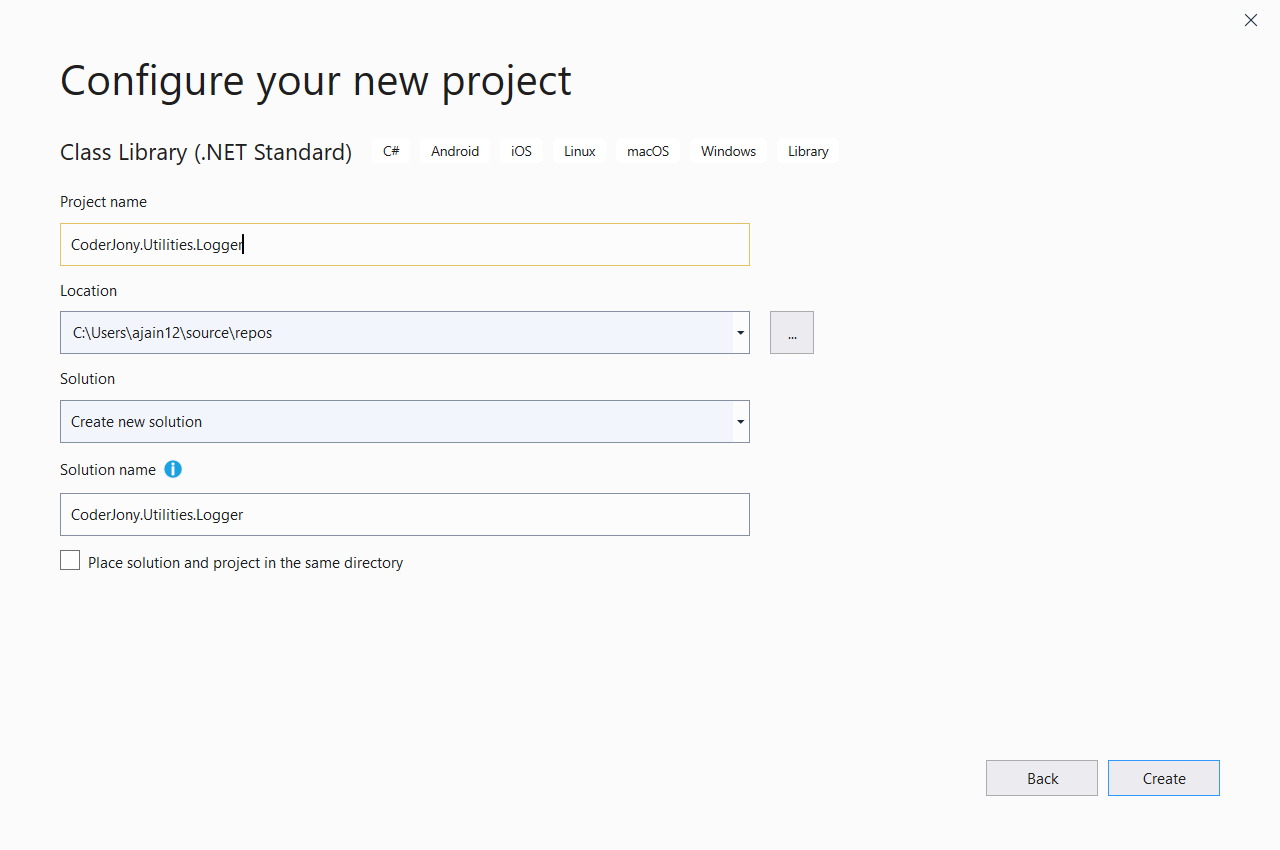
Step 2: Provide a name for your project. My project name is CoderJony.Utilities.Logger. Try to keep this project name the same as your NuGet package name just for consistency.
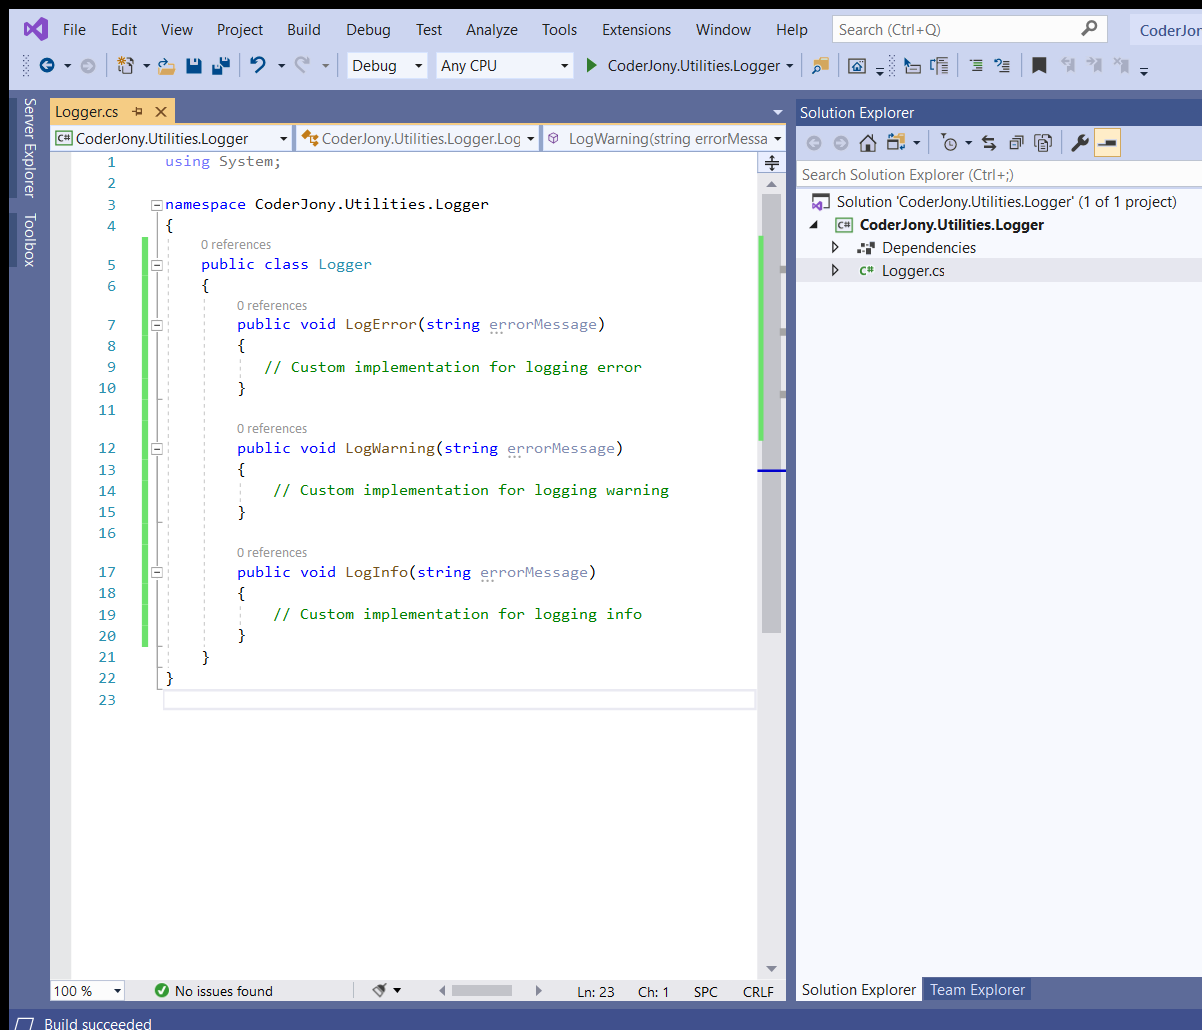
Step 3: Now I create a public Logger class and define some public methods inside that class.
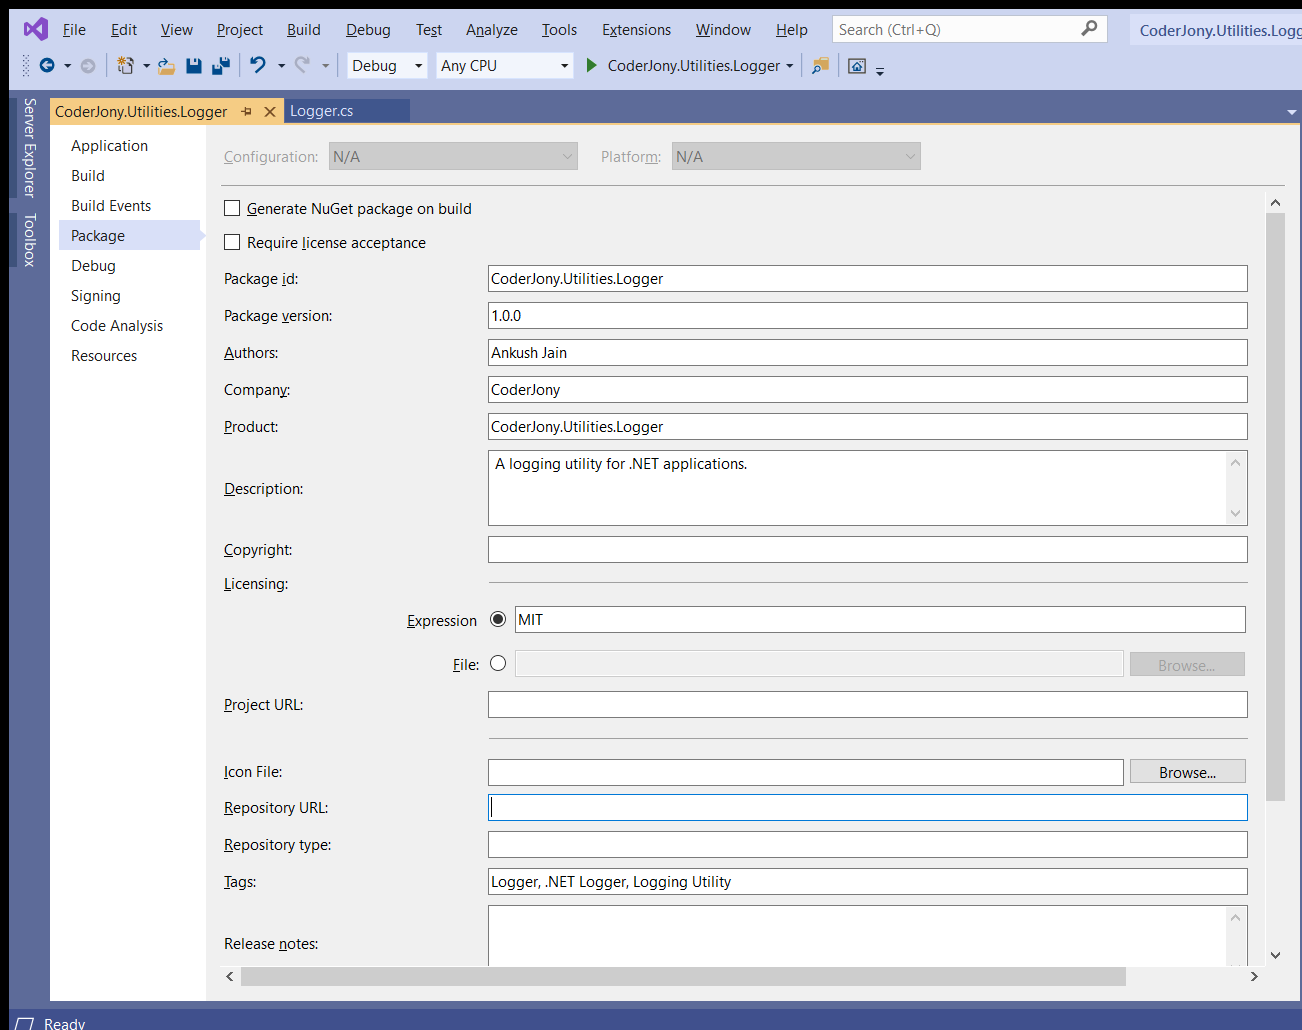
Step 4: Go to the properties of the project and select the package tab.
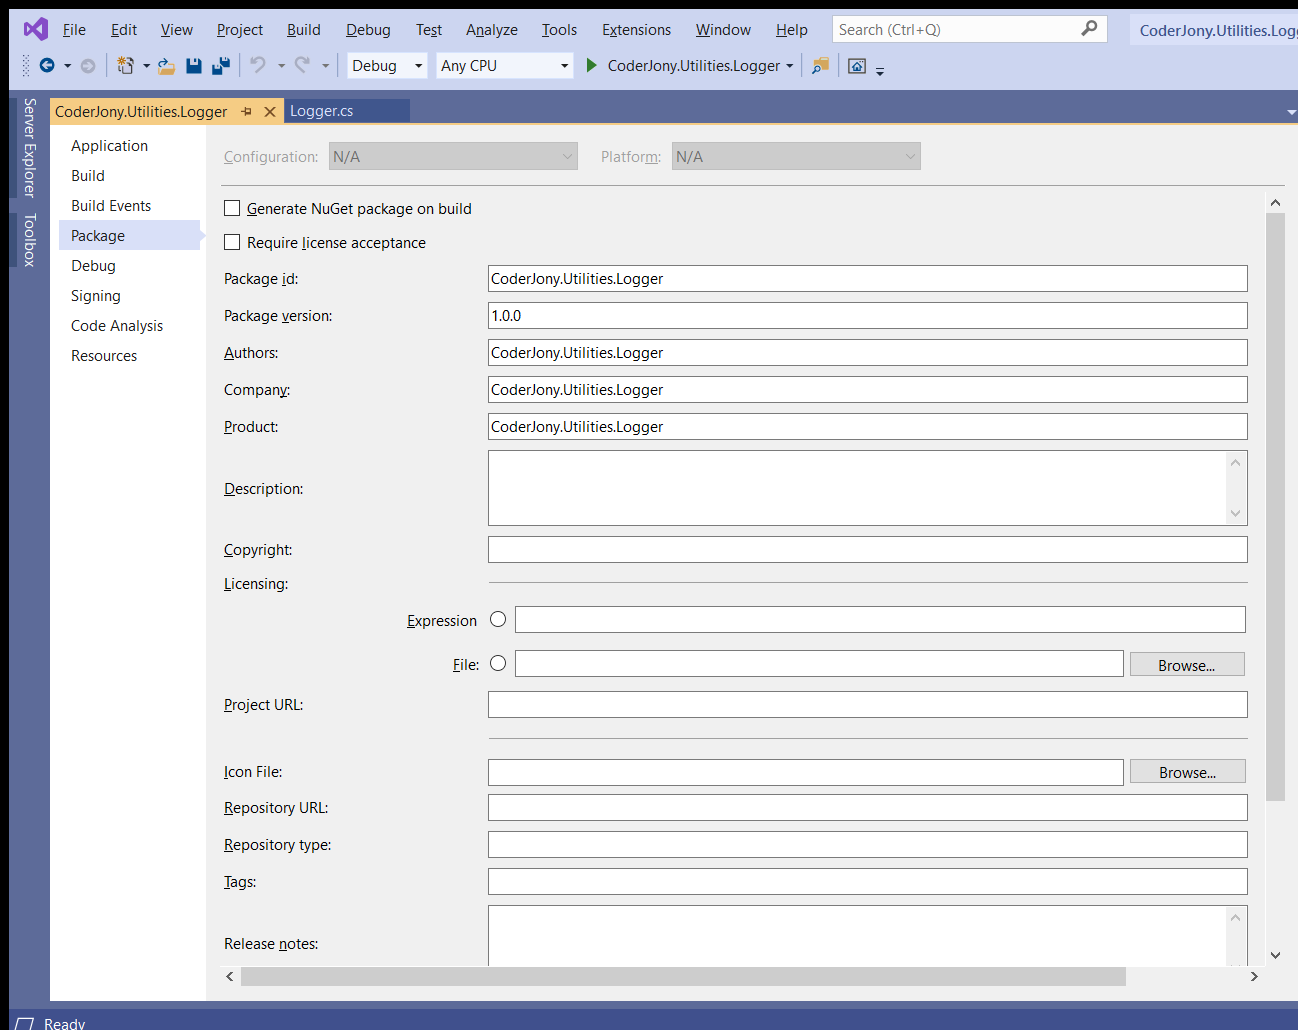
Step 5: This is the most useful step. In this step, I will tell you about the properties that you need to take care of the most.
The more information you provide here, the more informative your package will look in the search results.
Step 6 - Below, you can see, that I have provided all the information that is required for the NuGet package.
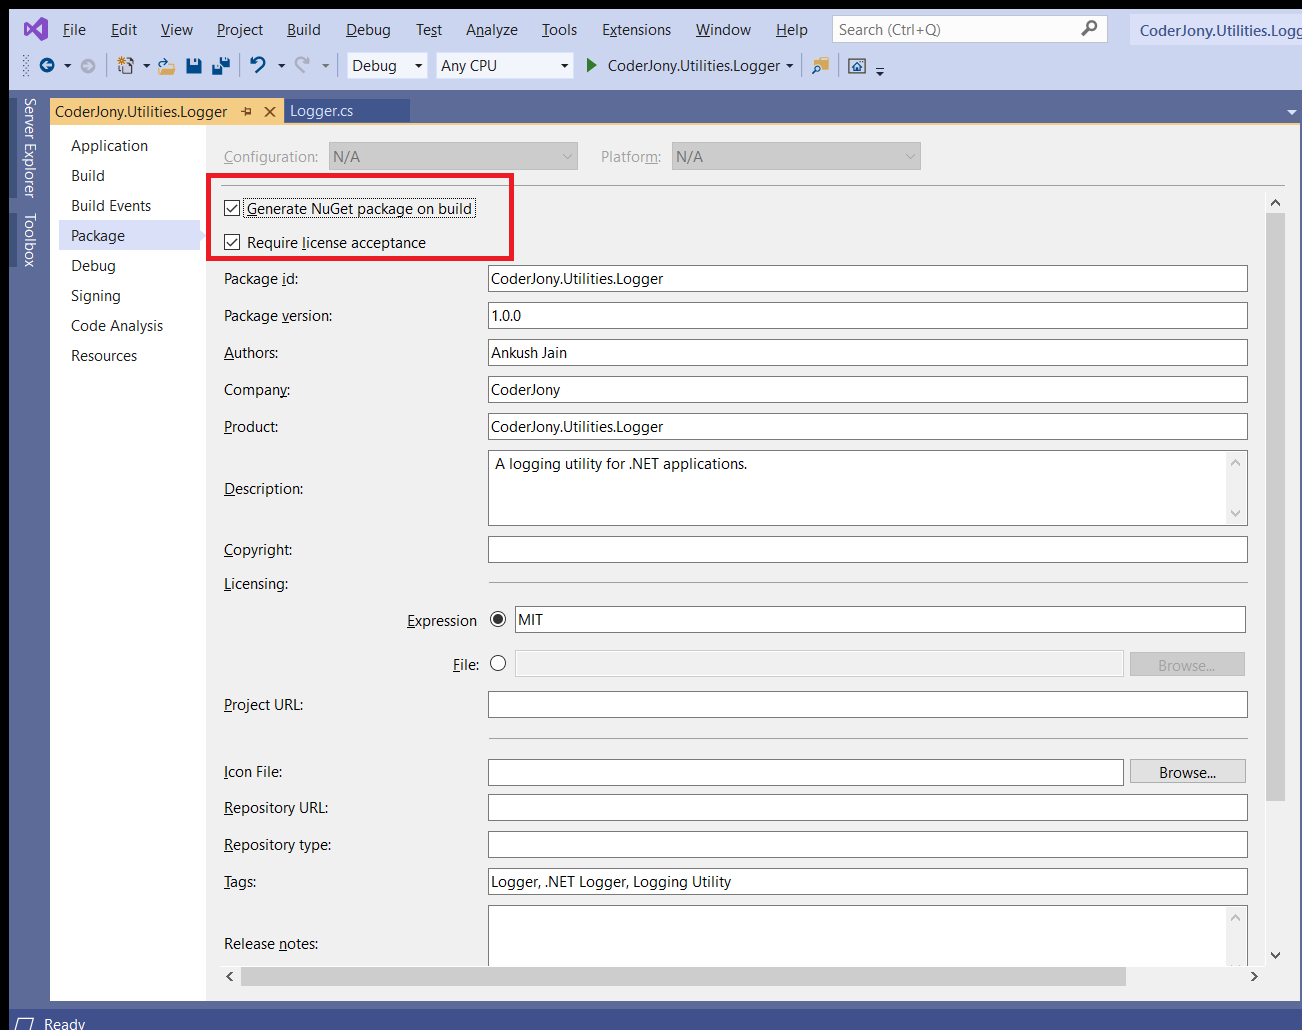
Step 7 - Just mark these two checkboxes that are highlighted below.
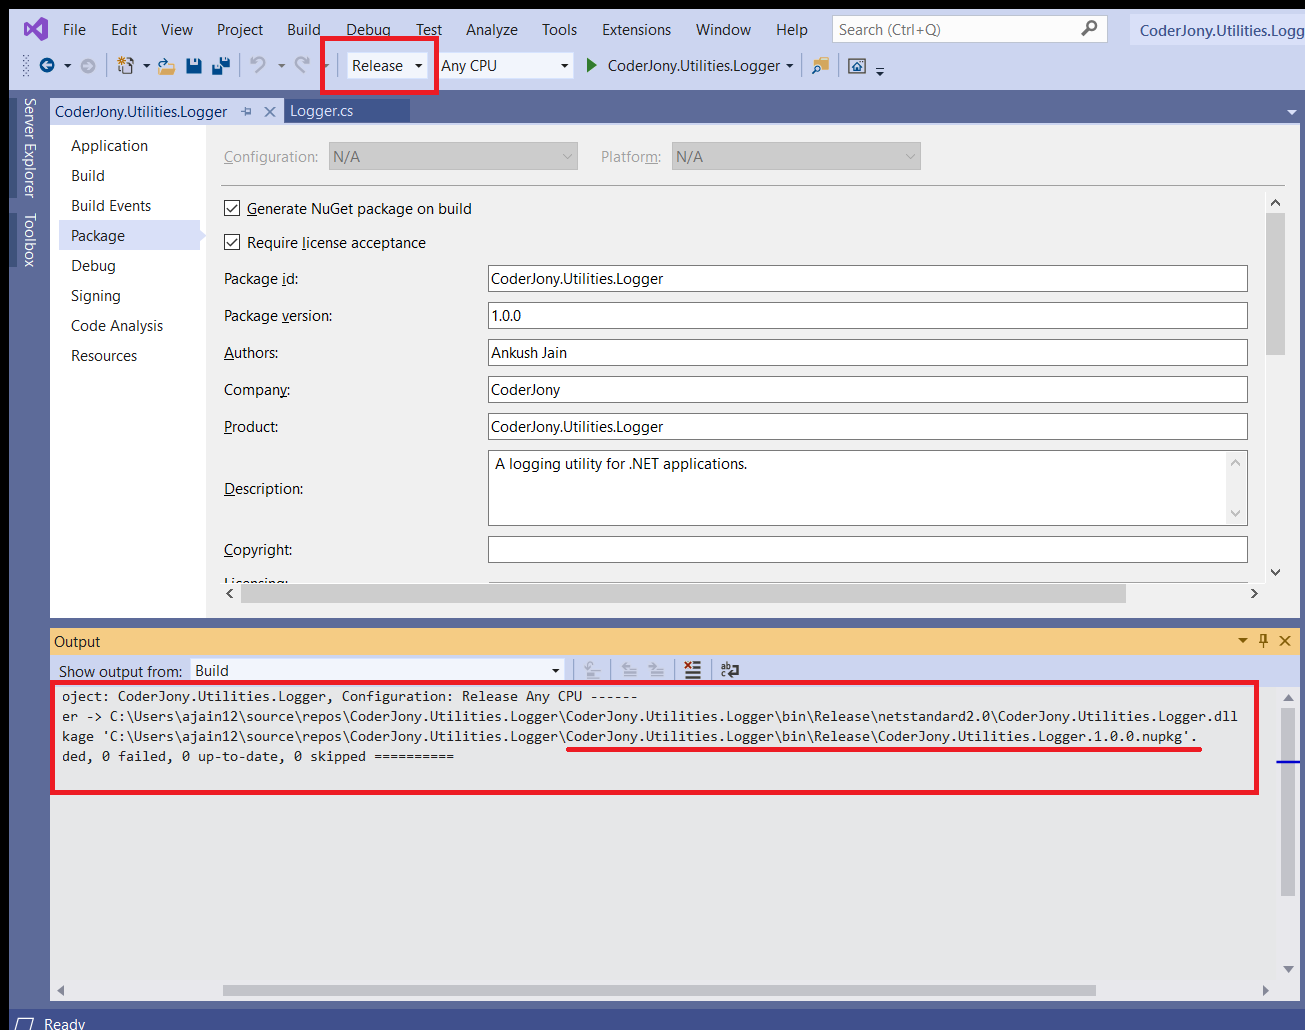
Step 8 - Now select Release mode and build the application. You can see a .nupkg file has been generated inside ~\bin\release\ folder.
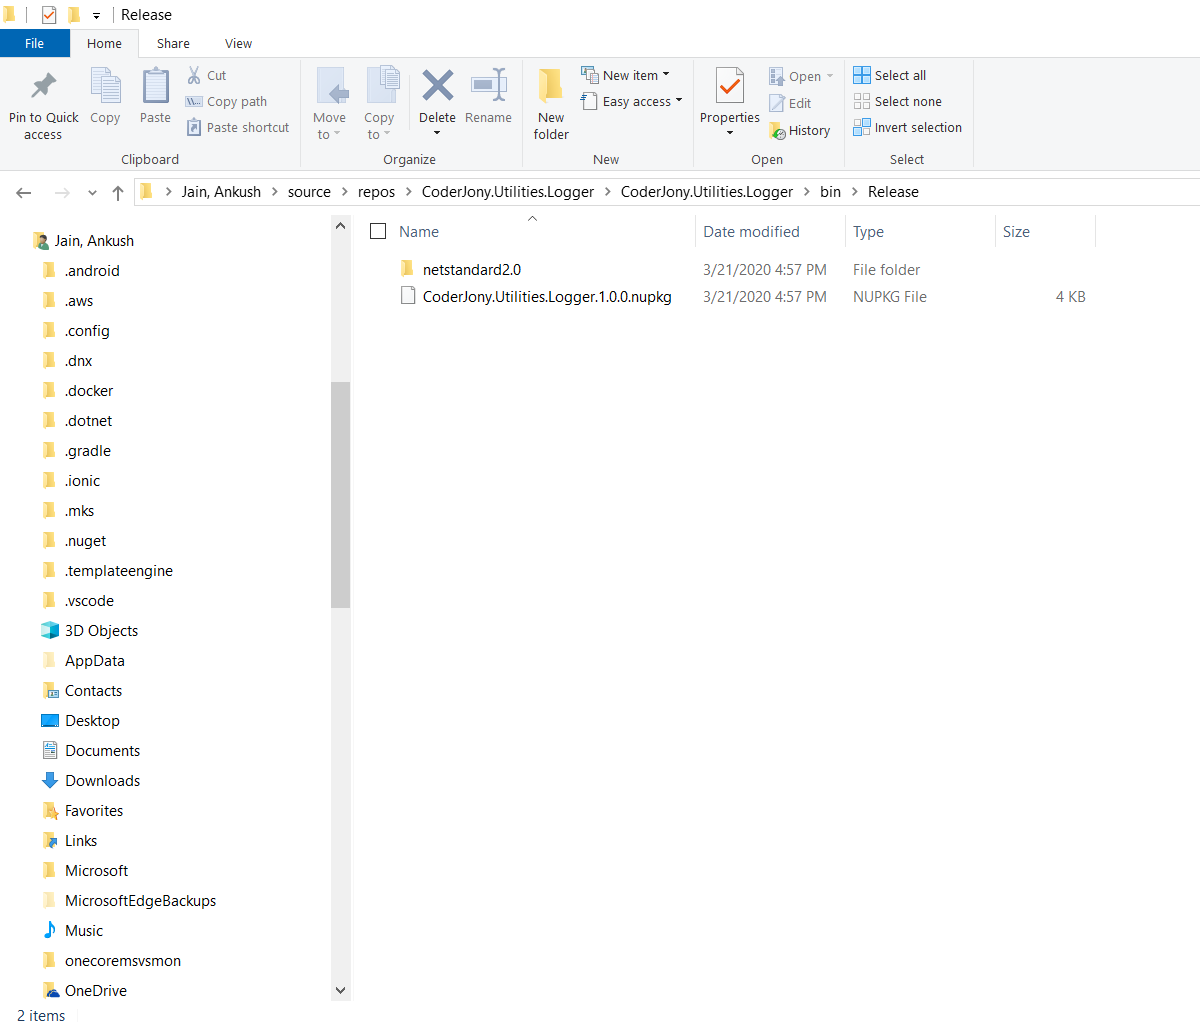
Step 9 - Here you can see the generated .nupkg file.
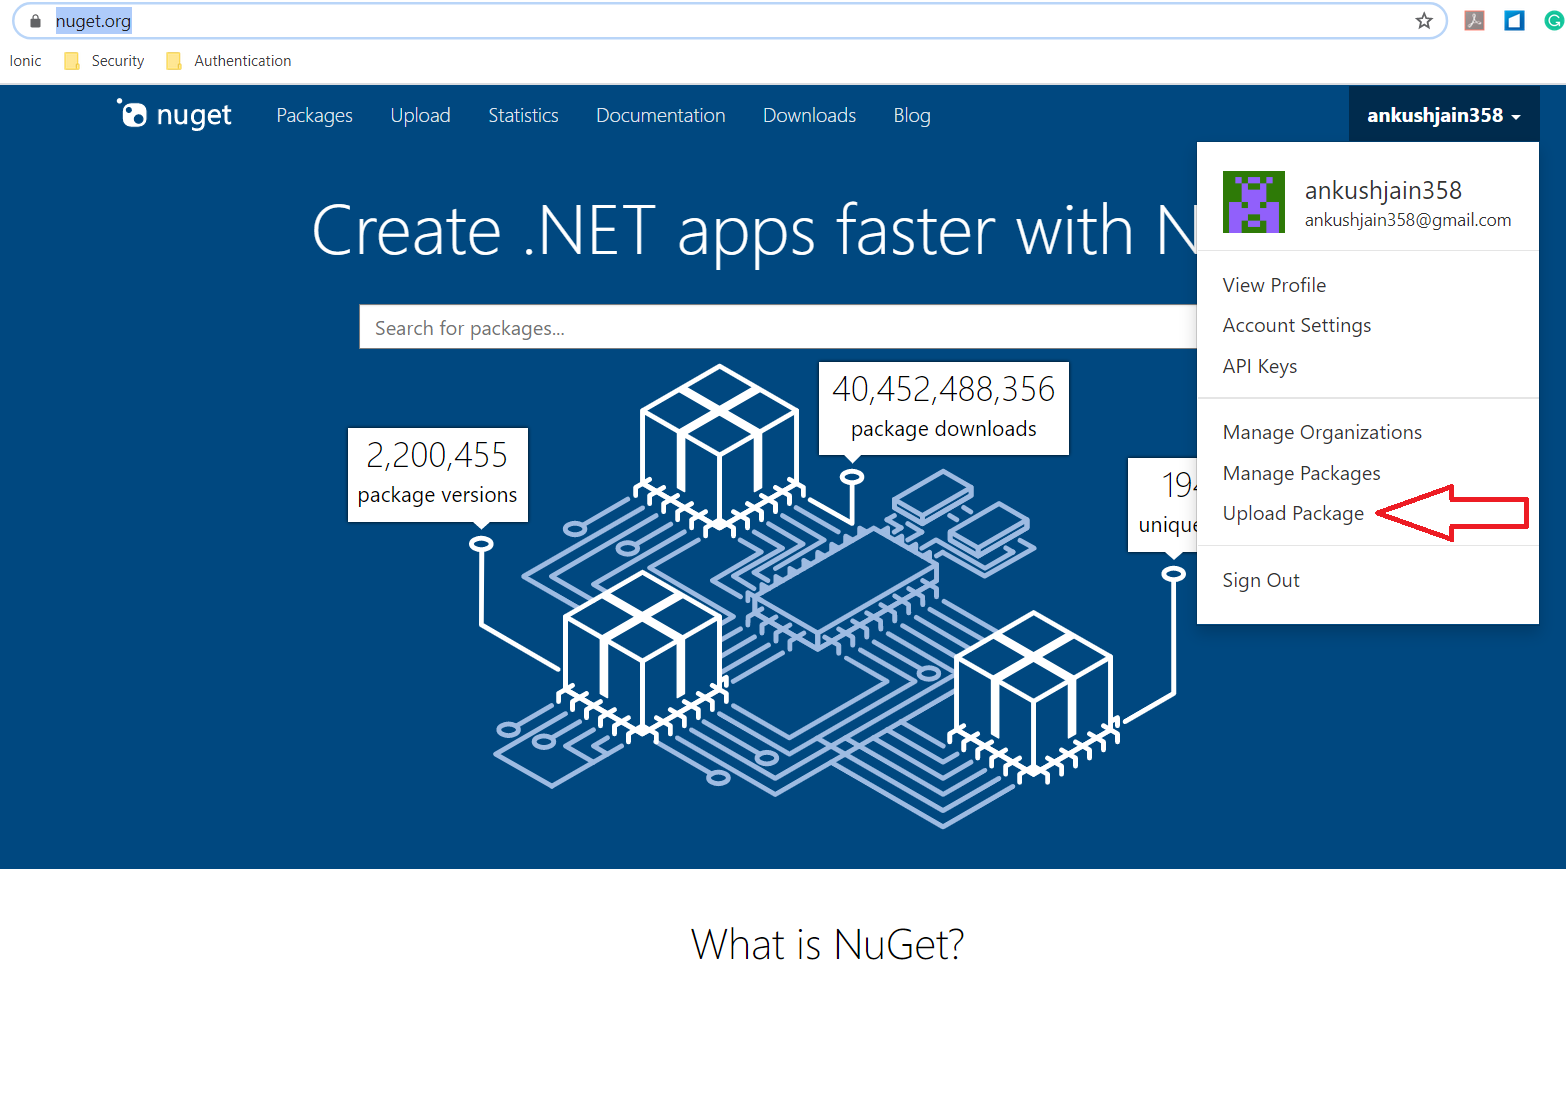
Step 10 - Now login to nuget.org with your Microsoft account and click on Upload Package link.
Step11 - Drag and drop the generated .nupkg file here. As you can see I have dropped my .nupkg file here.
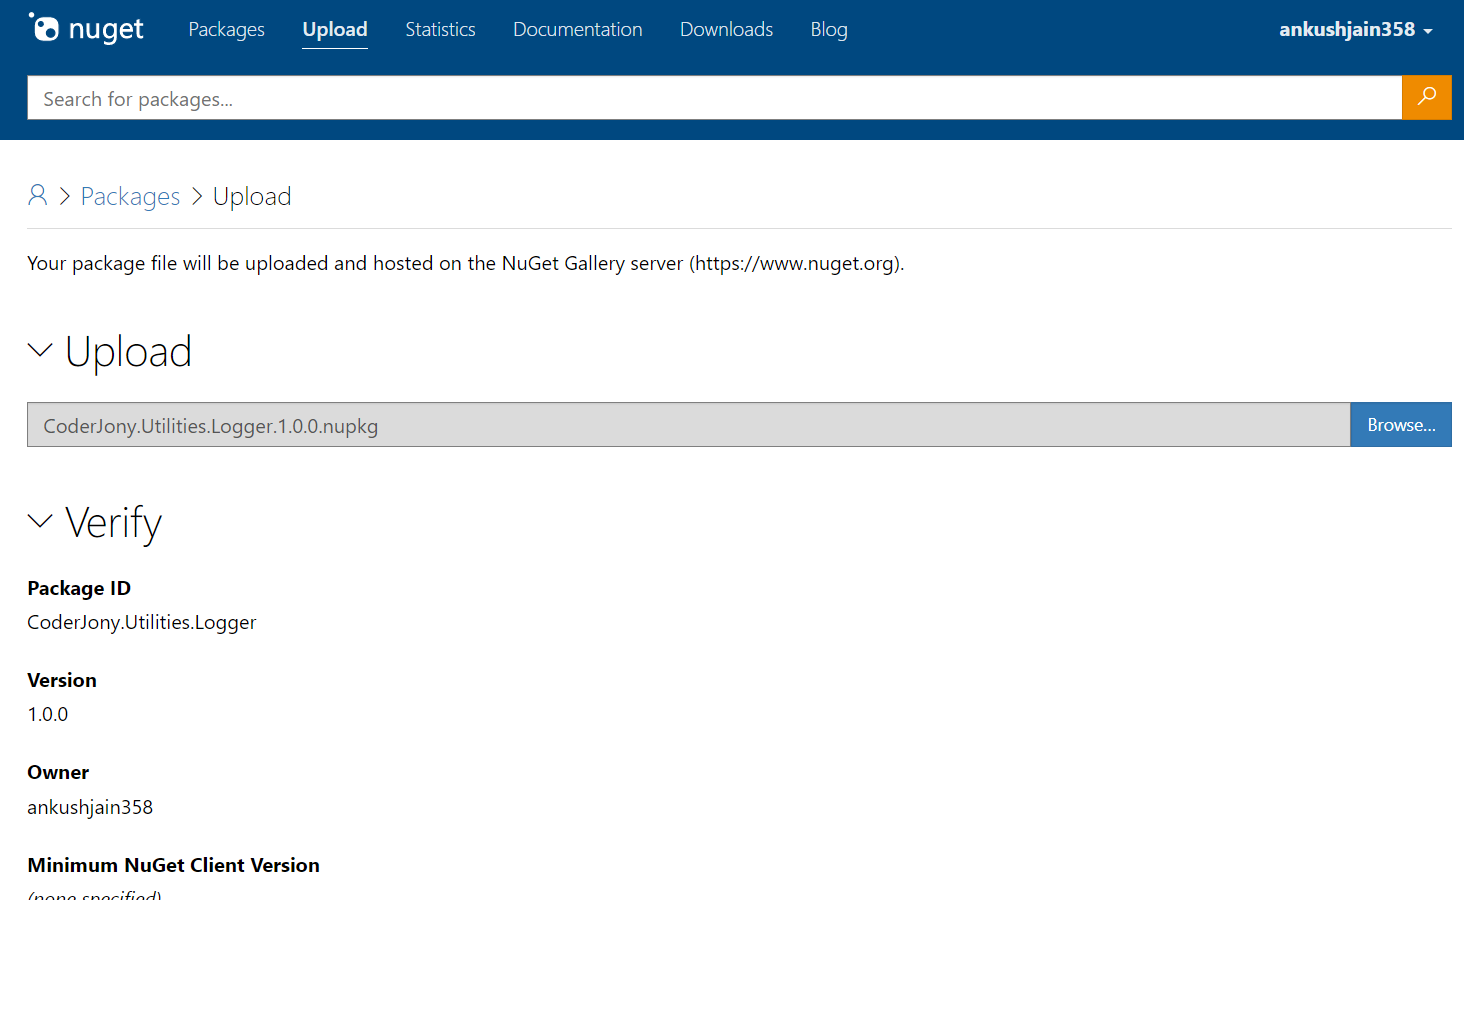
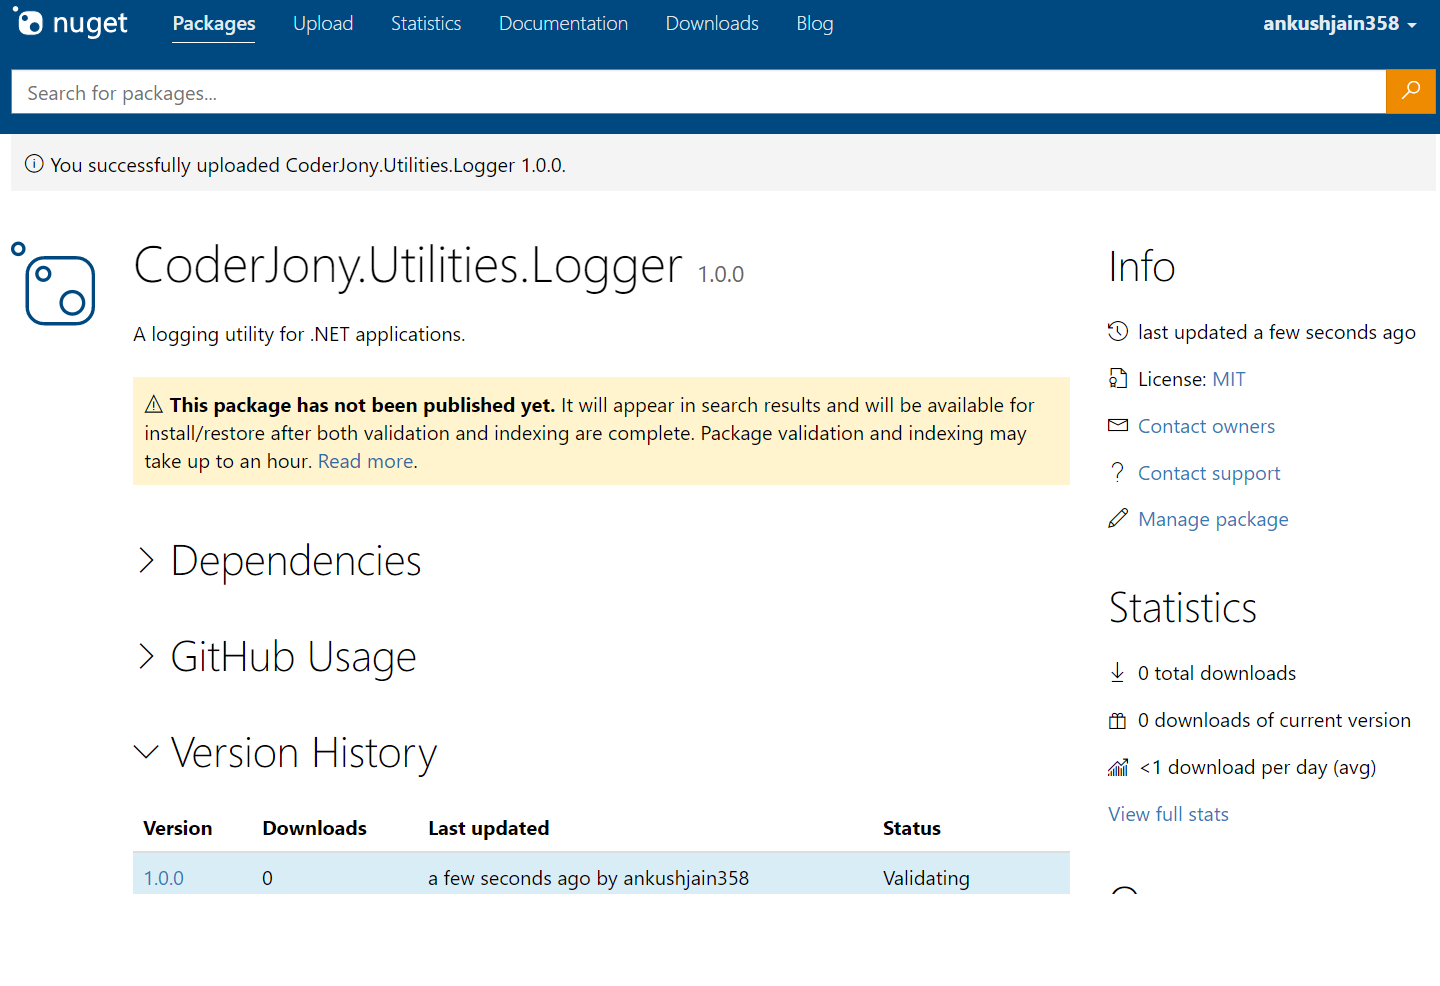
Step 12 - Verify the provided information and press the submit button at the end of the page. After submitting the information, you will be redirected to your package's page.
Note: NuGet takes some time to validate your package after upload. After around 5 minutes, you will find that this warning is removed automatically.
Step 13 - After a few minutes, you can see - your package is available for use.
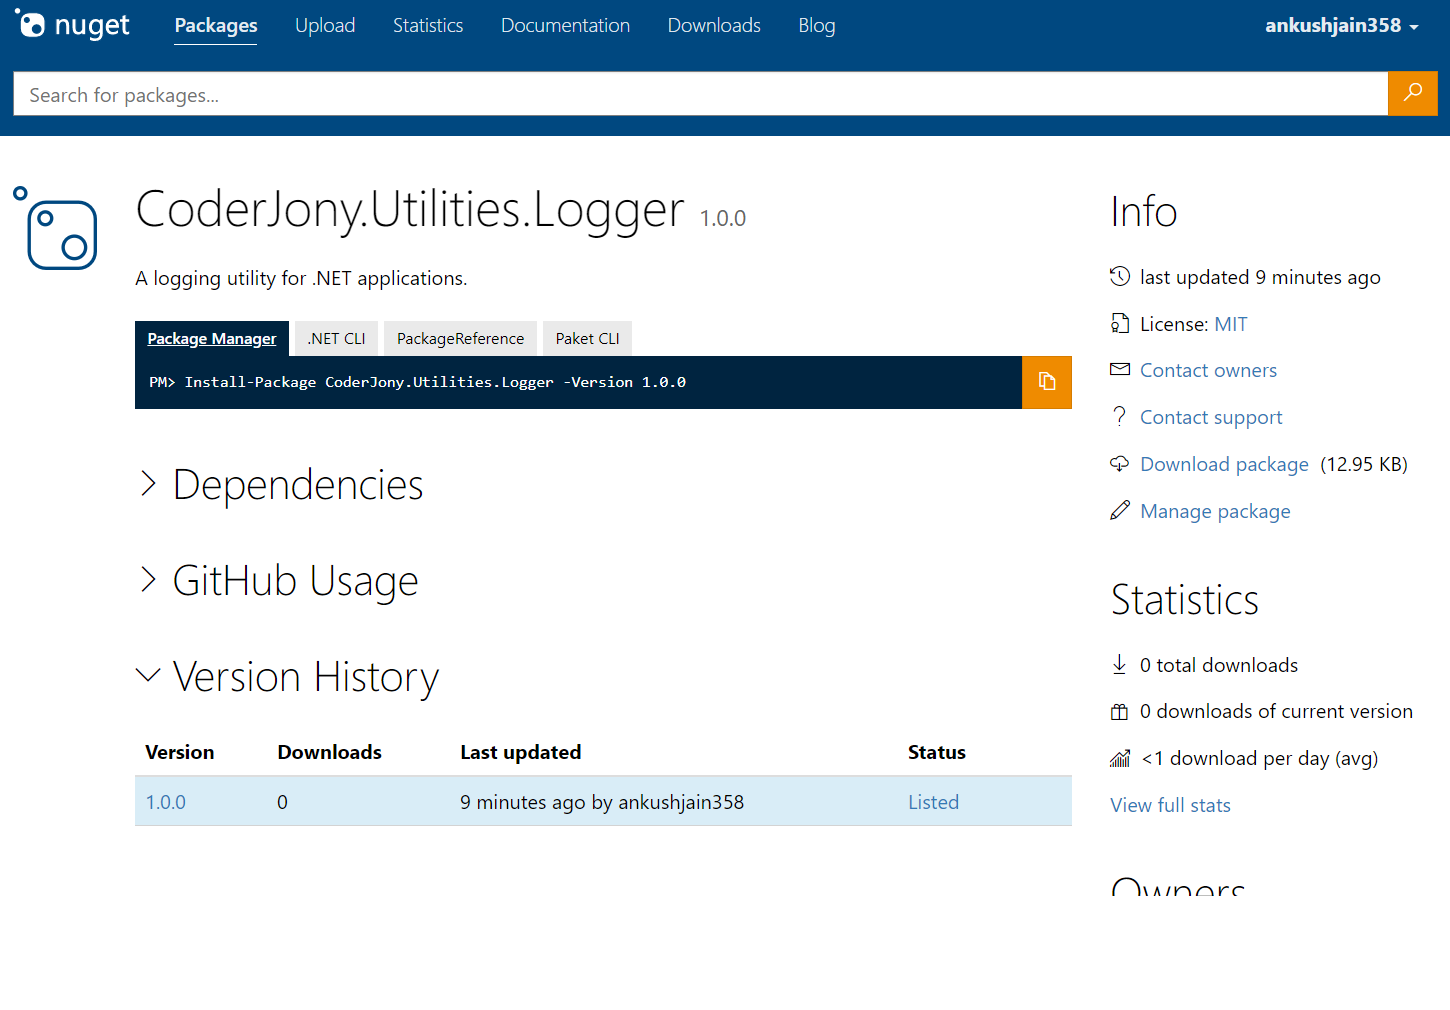
Step 14 - Now we can install this NuGet package in any of our .NET projects.
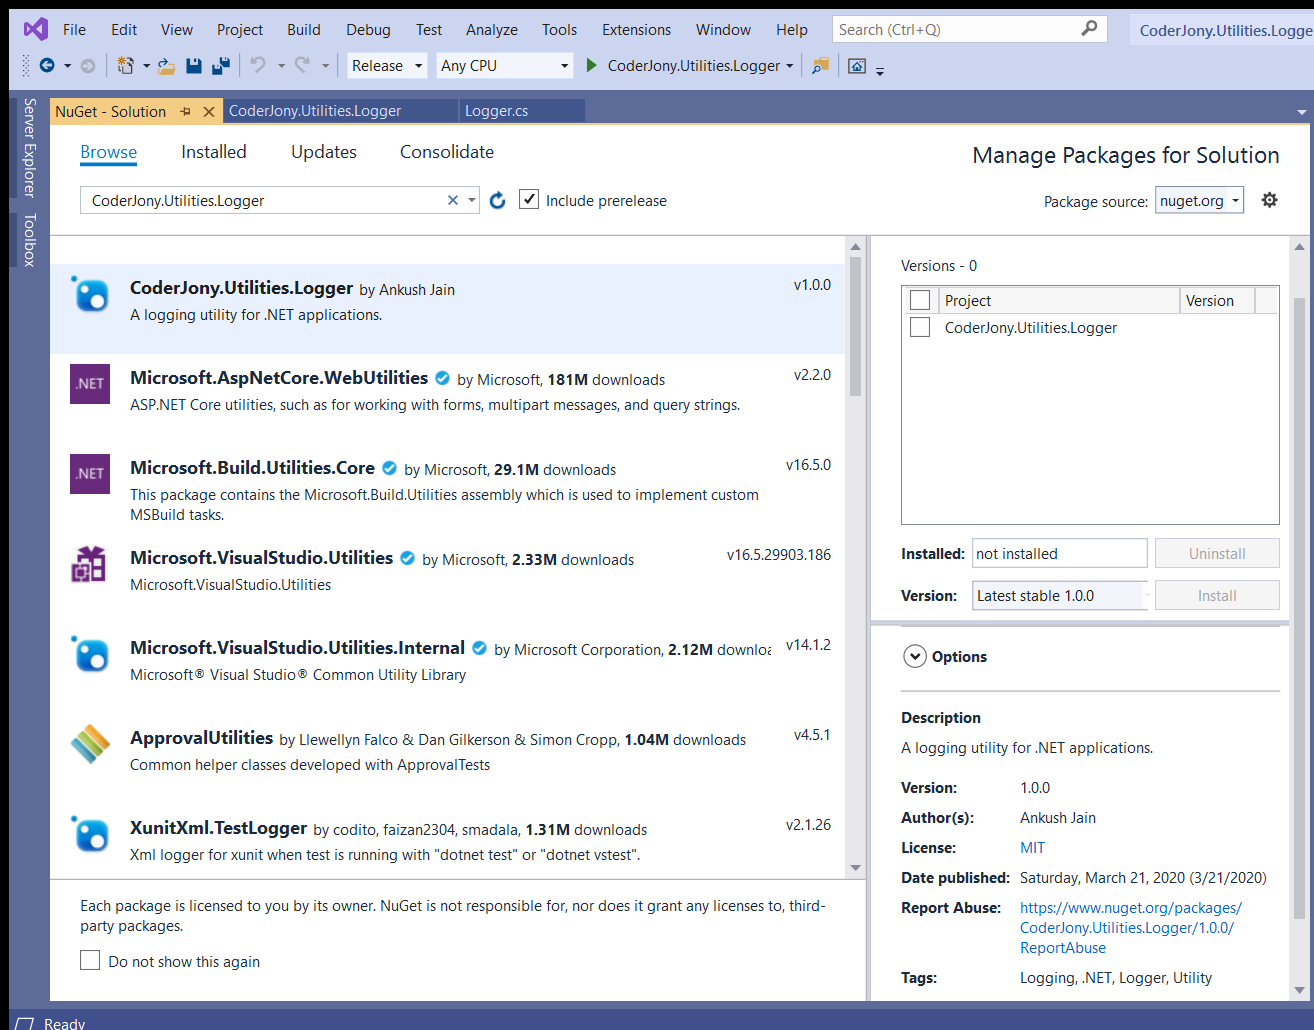
Congratulations !!! We have created a NuGet package in less than 30 minutes. Please let me know your feedback and suggestions in below comment box.
Happy Coding :)

