Disclaimer: I am a consultant at Amazon Web Services, and this is my personal blog. The opinions expressed here are solely mine and do not reflect the views of Amazon Web Services (AWS). Any statements made should not be considered official endorsements or statements by AWS.
In this post, we will create a Cost Alert for your Azure account. So, let's understand the purpose of the Cost Alert and how can it help.
The main purpose of Cost Alert is that you want to be aware of your Azure spending while running your Azure account.
Let's say, you start a business and you run your website and all your services in Azure. In the beginning, you won't know exactly what will be your spending in Azure. For this, you can create a budget in Azure, and set alerts on top of that. This way you would be notified once your spending reaches your defined budget.
Creating a Cost Alert in Azure simply means that you are saying - "Hey Azure! Please notify me once my spending reaches 80%, 90%, or X% of my defined budget."
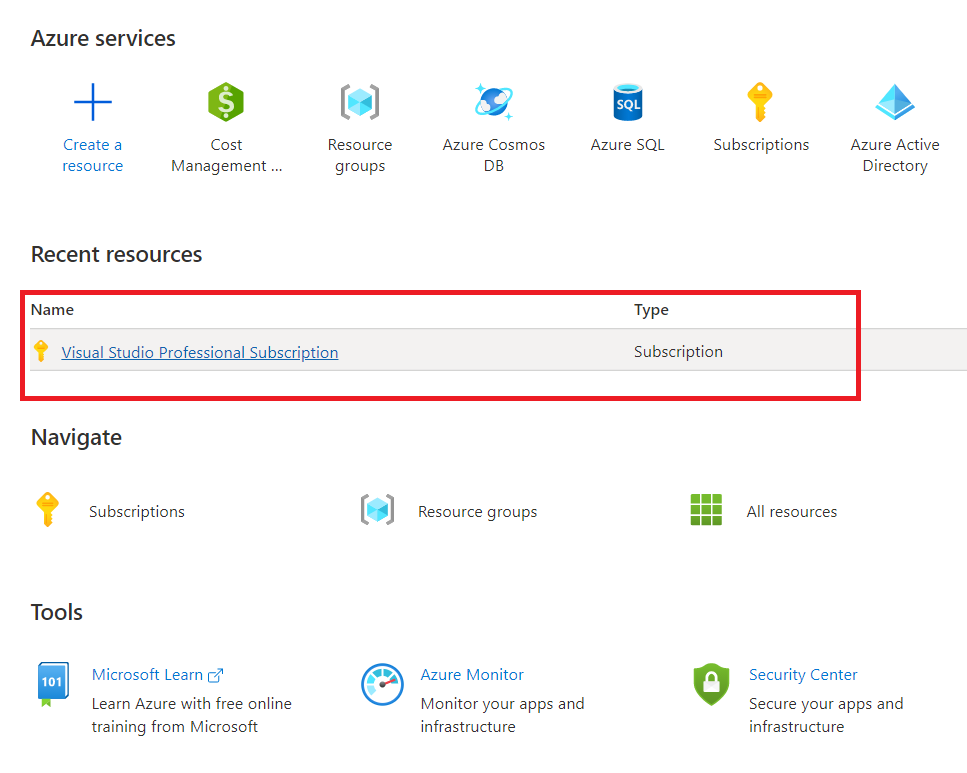
Navigate to Azure Portal from portal.azure.com. Select the subscription you want to set alerts on.
Select Budgets option from the left-hand side menu and click on Add button.
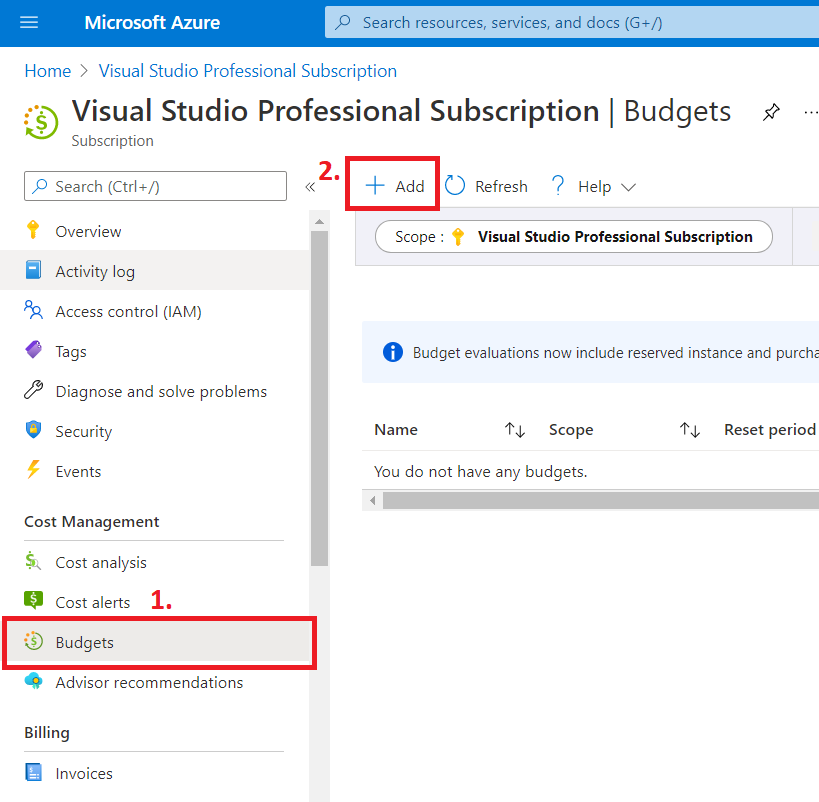
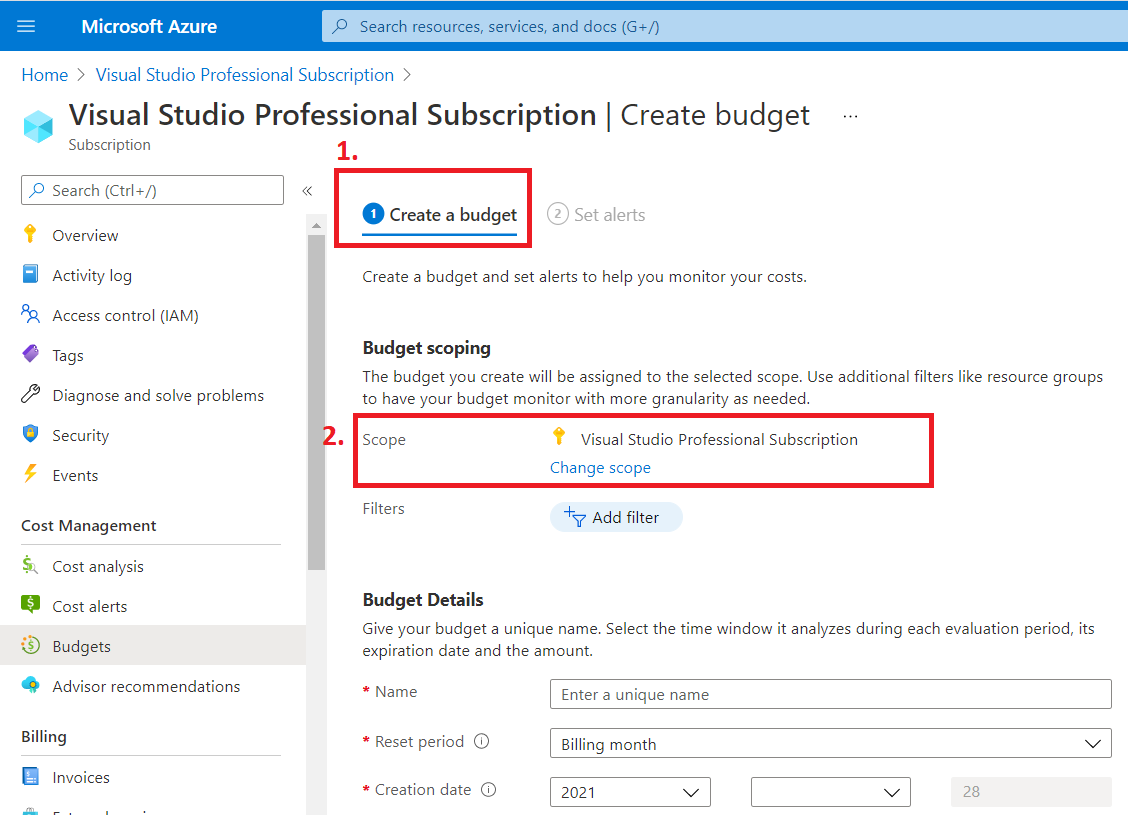
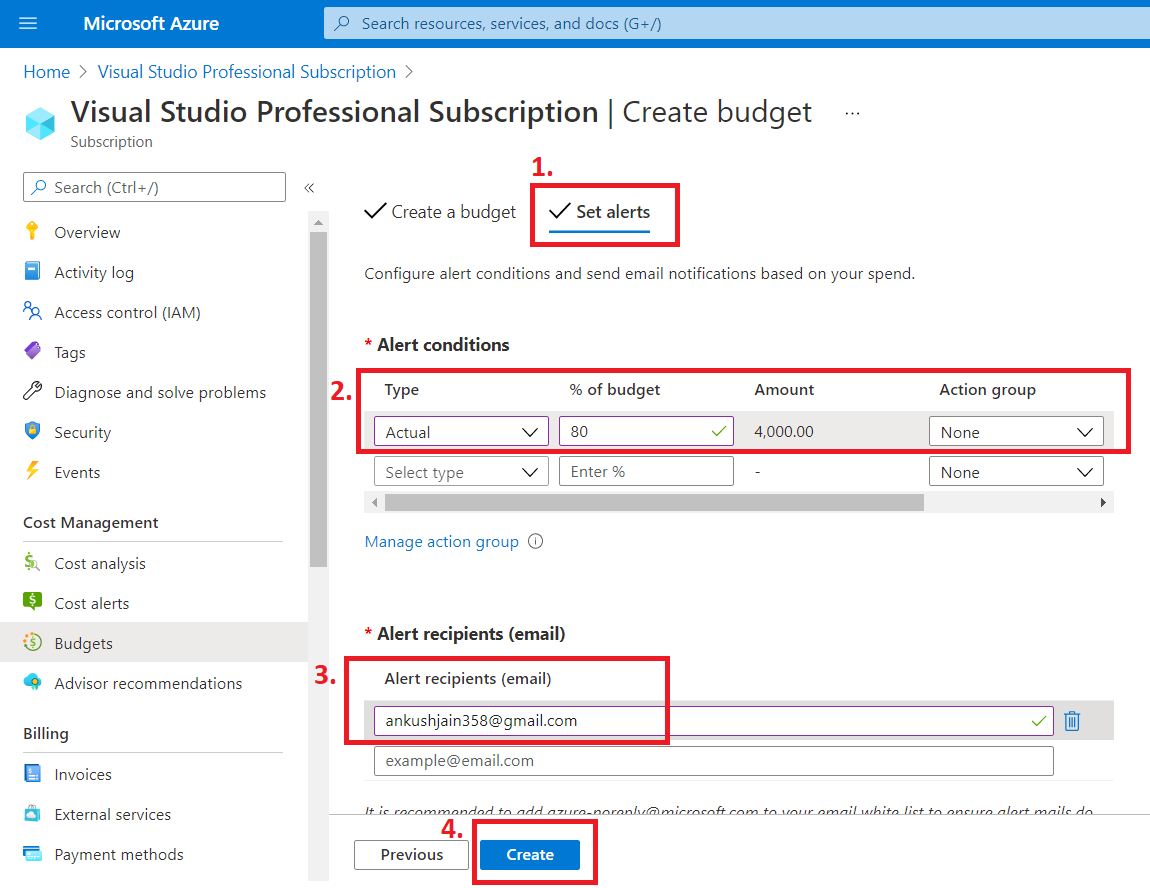
As you can see, this is a two-step process. First, we need to create a budget and second, we need to set alerts for that budget.
Now, please select the Scope for the budget. Here, scope is a level at which you want to track the spending. In our case, the scope is Subscription, but you can also change it as per your need. Click here to read more about scope.
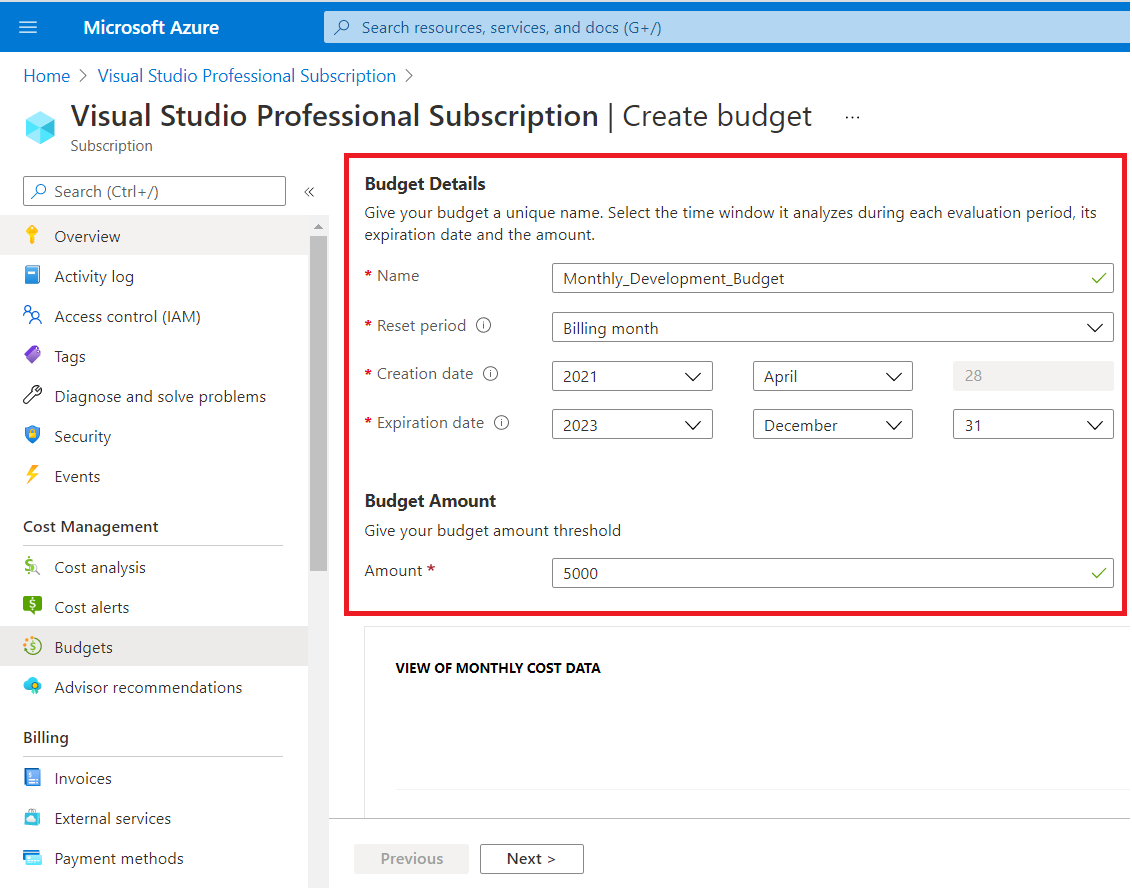
Enter budget details - Budget name, Budget creation & expiration date, and Budget amount. Also, note that the currency for the budget amount will be the same as your billing currency. Here, I have put INR 5000 as my monthly development budget.
In the second step, select Alert Conditions. Here % of budget says that you will be notified once your spending reaches x% of your defined budget. In my case, I have set it to 80%, which means, I will be notified once my spending reaches INR 4000.
Apart from this, also enter the email Id where you want to get alert notifications.
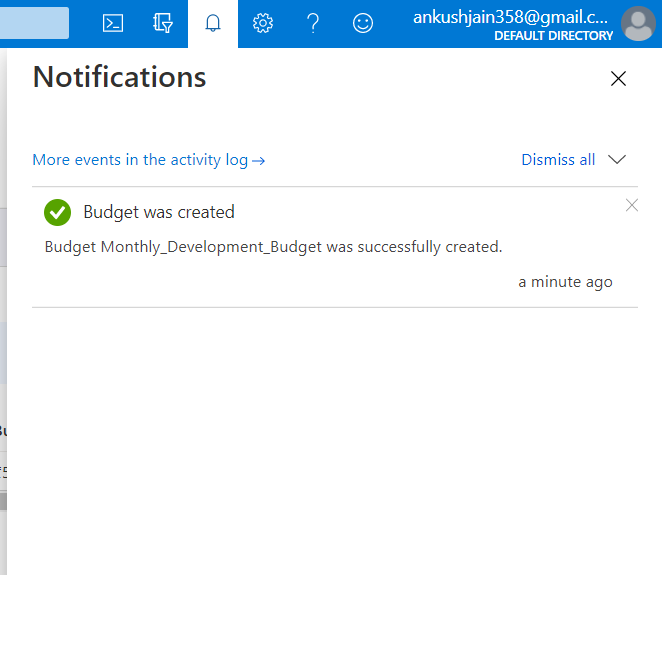
After creating an alert, you will get a success notification.
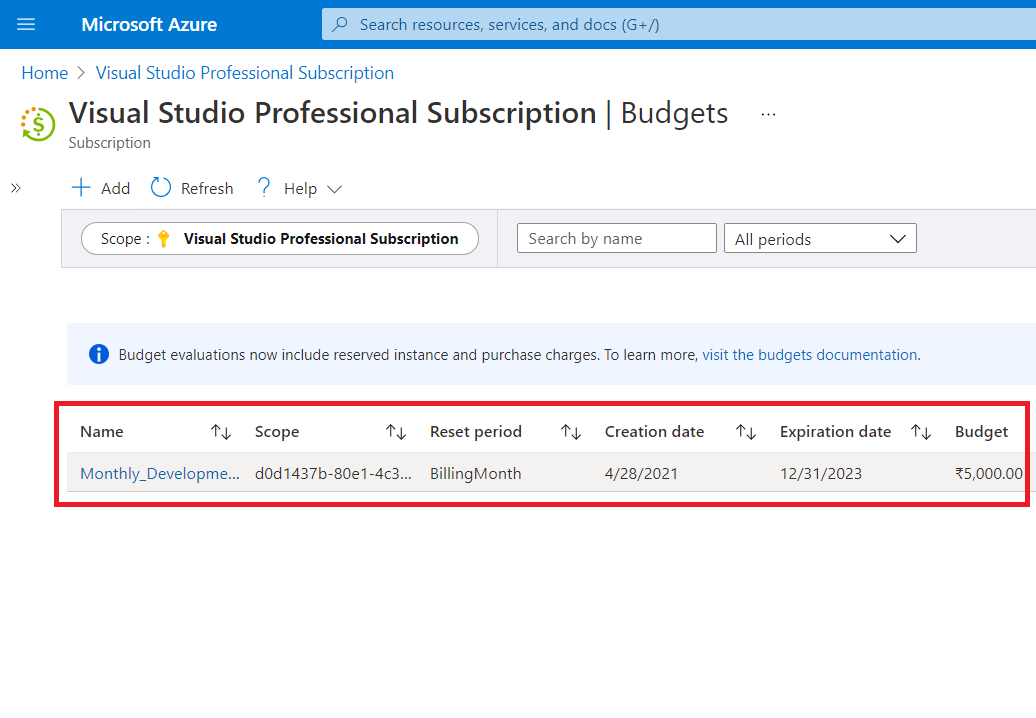
Also, you can see that a new budget is showing up on the list now. Let's select this budget to review the configuration.
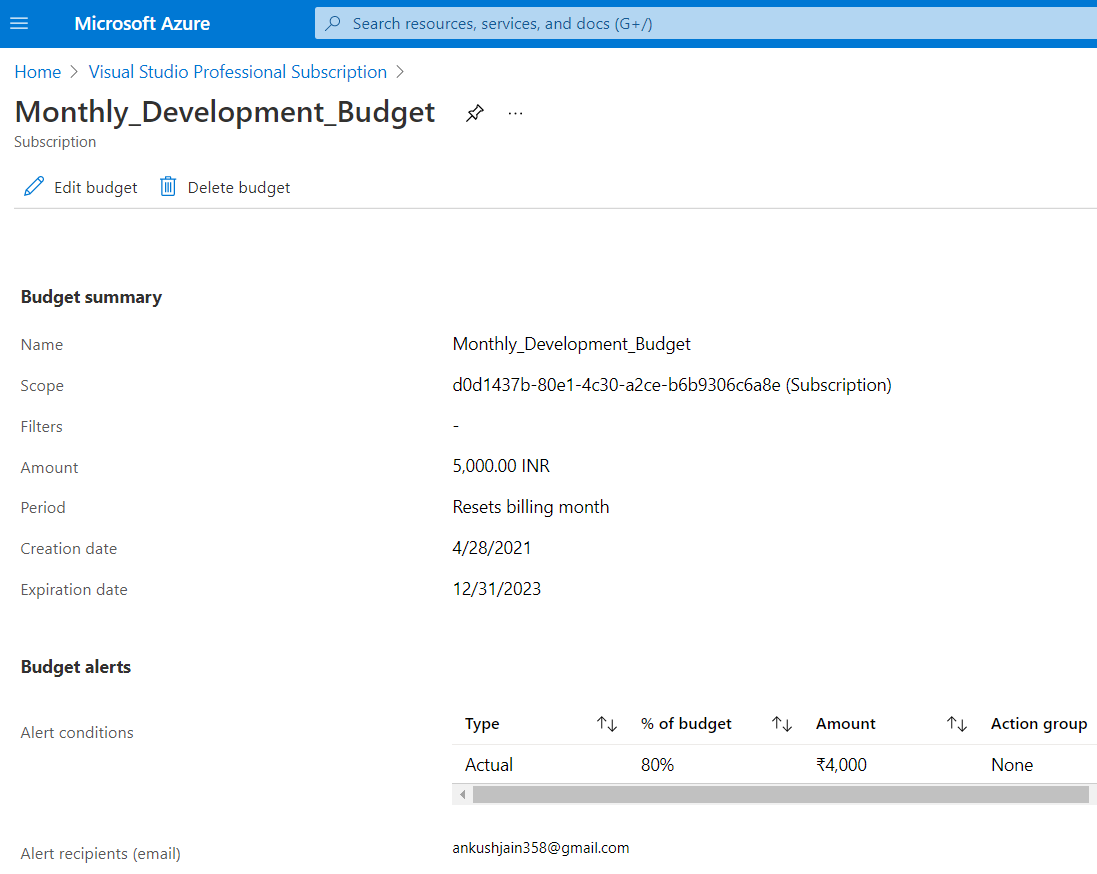
Review and verify that all the details on this page are the same as you entered earlier.
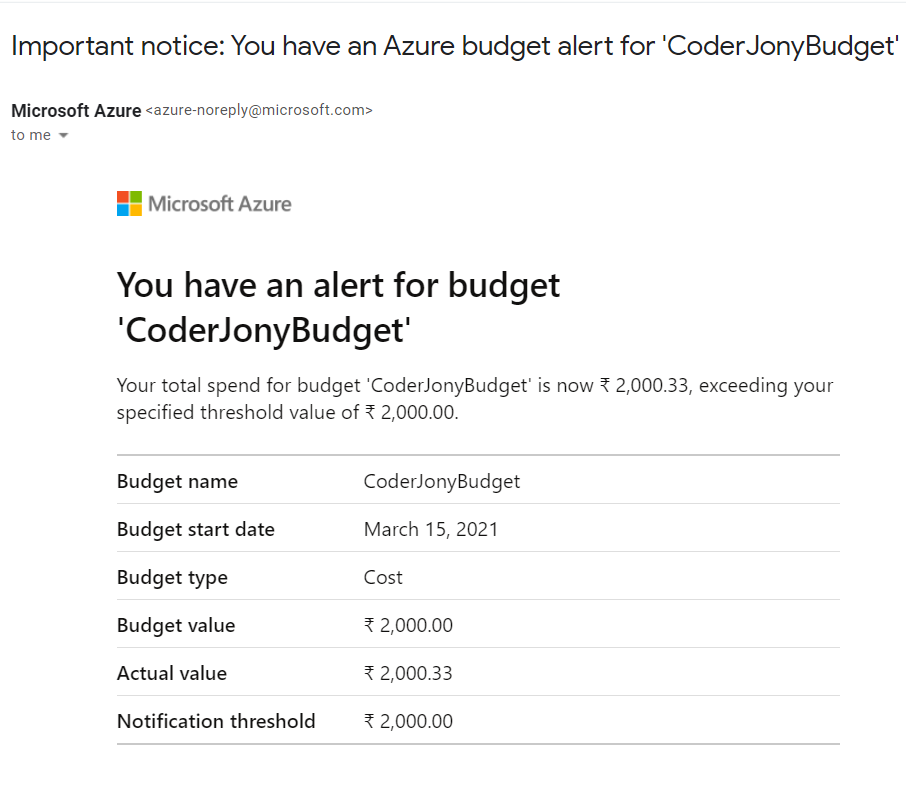
This is an Example Alert Email Notification that you will receive as a Budget Alert from Azure.
Great! We're all done. That's all with this post. I hope this would be helpful to you.

