Disclaimer: I am a consultant at Amazon Web Services, and this is my personal blog. The opinions expressed here are solely mine and do not reflect the views of Amazon Web Services (AWS). Any statements made should not be considered official endorsements or statements by AWS.
In this post, we will understand, how can we implement Login with Google Account functionality in our web application. We will be doing this authentication using the Open Id Connect protocol.
First, you have to register an application on Google to get a Client Id and Client Secret. Check out this blog post Register a Client application in Google where I have explained this process step by step.
Open the Google discovery document in a new tab from the below link.
Google Discovery Endpoint - https://accounts.google.com/.well-known/openid-configuration
A Discovery Document has all the necessary values defined in the OpenID Connect protocol. This also helps clients to configure OpenID implementation on their side.
If you are not familiar with Discovery Document, refer to this - OpenID Connect Discovery Document,
Copy the authorization_endpoint from the discovery document, and consider it as a base URI.
Base Address - https://accounts.google.com/o/oauth2/v2/auth
Add below required query parameters in this base URI:
code, as we are using Authorization Code Flow. Click here to see all grant types or authorization flow.openid, then add email or profile or both. i.e. openid email profile.For all available parameters, refer to this Authentication URI parameters
So, finally, the constructed URL becomes like this:
https://accounts.google.com/o/oauth2/v2/auth?
client_id=153956101972-pnukt83olcgcm1alq96mjfsvhto2vpiv.apps.googleusercontent.com
&response_type=code
&scope=openid email profile
&redirect_uri=http://localhost
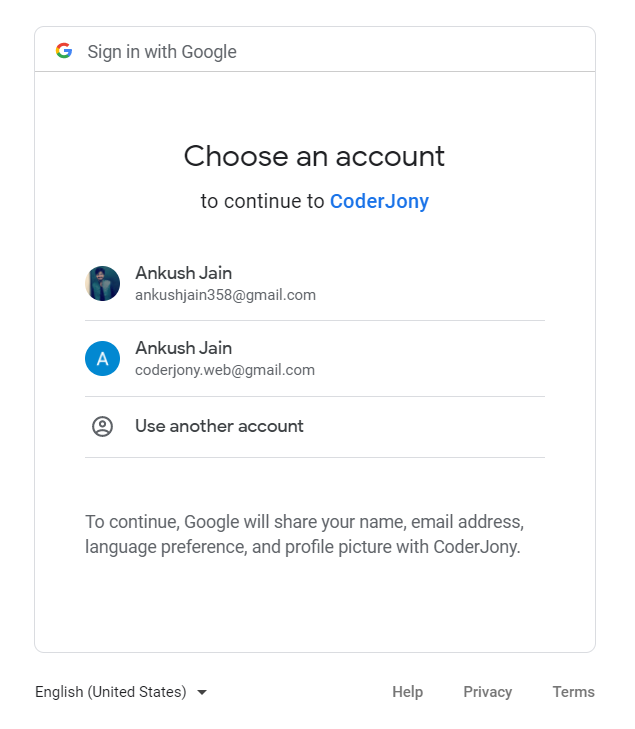
Copy the above URL and paste it into the browser. You will see a Google Login screen like this. Select an account and do the login.
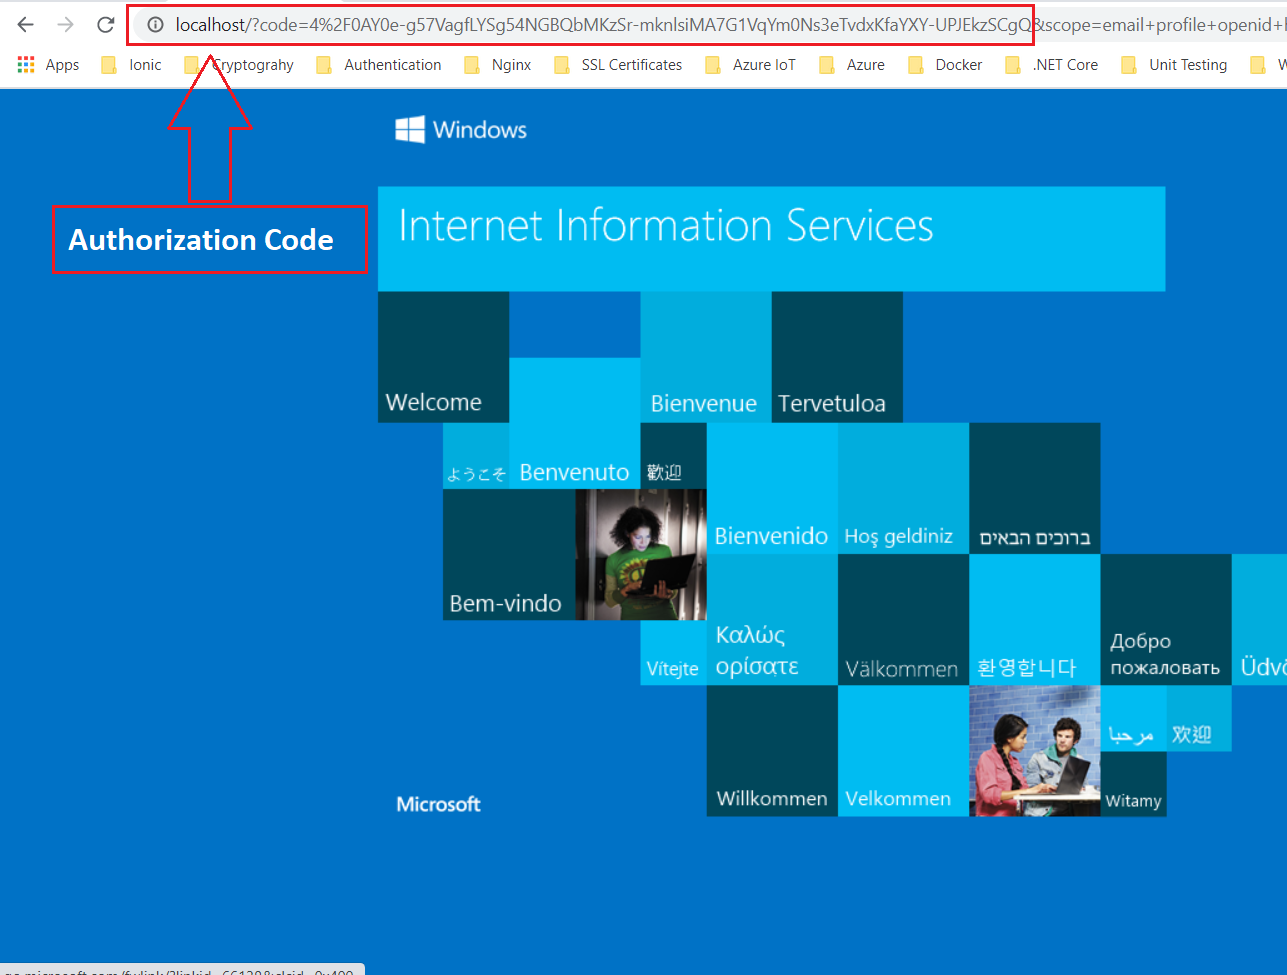
After login, you will be redirected to the redirect_uri that you mentioned in the above URL. Notice, that here we have received a code in the query parameter.
New URL - http://localhost/?code=4%2F0AY0e-g57VagfLYSg54NGBQbMKzSr-mknlsiMA7G1VqYm0Ns3eTvdxKfaYXY-UPJEkzSCgQ
This is because we have used response_type as code.
Now the time is to get the ID Token and Access Token from this code. So, we construct one more URL to exchange this code with id_token and access_token.
Copy the token_endpoint from the above discovery document and consider it as the base URI.
Base Address - https://oauth2.googleapis.com/token
Add below required query parameters in this base URI:
authorization_code here, as we are using authorization code flow.So finally, the constructed URL becomes like this
https://oauth2.googleapis.com/token?
code=4%2F0AY0e-g57VagfLYSg54NGBQbMKzSr-mknlsiMA7G1VqYm0Ns3eTvdxKfaYXY-UPJEkzSCgQ
&client_id=153956101972-pnukt83olcgcm1alq96mjfsvhto2vpiv.apps.googleusercontent.com
&client_secret=p0gKOTz39HoiCA1Rj72zHnrk
&redirect_uri=http://localhost
&grant_type=authorization_code
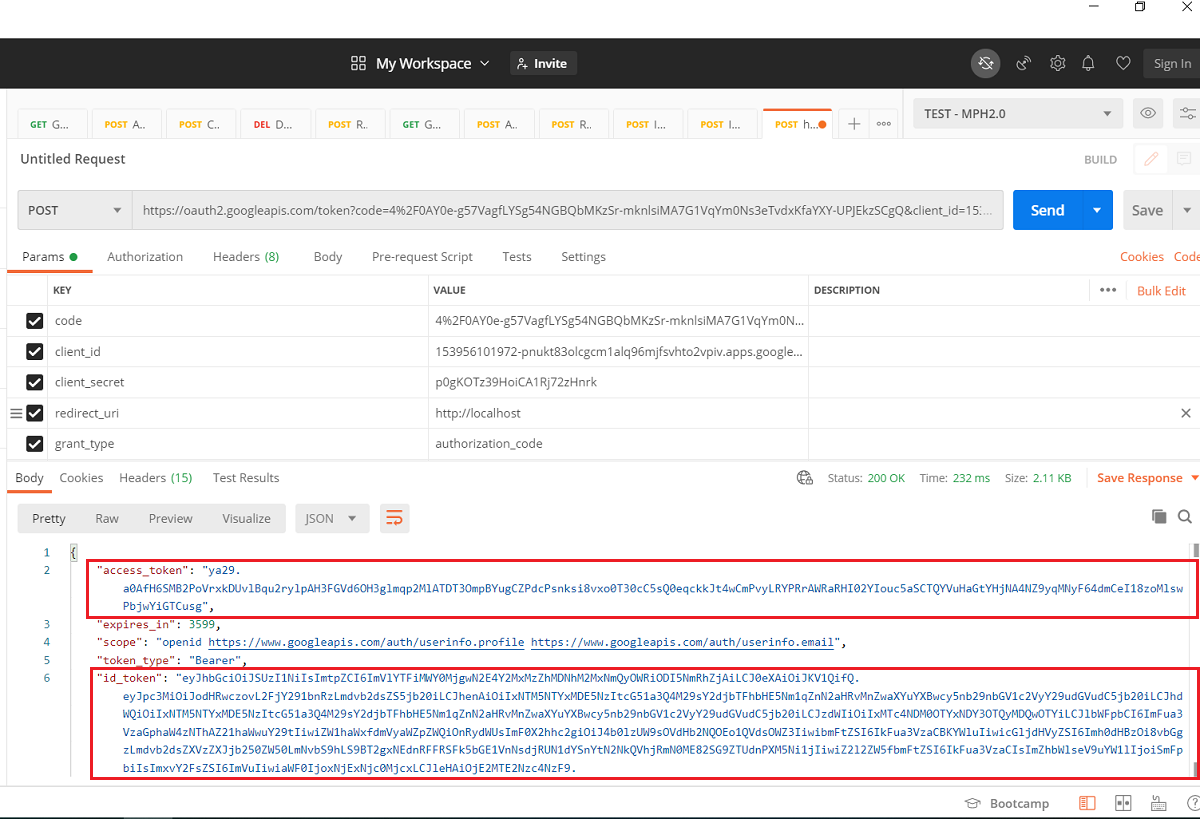
Now, we use Postman to make a POST request on this URL. So, as you can see, we have received both Access Token and ID Token in the response.
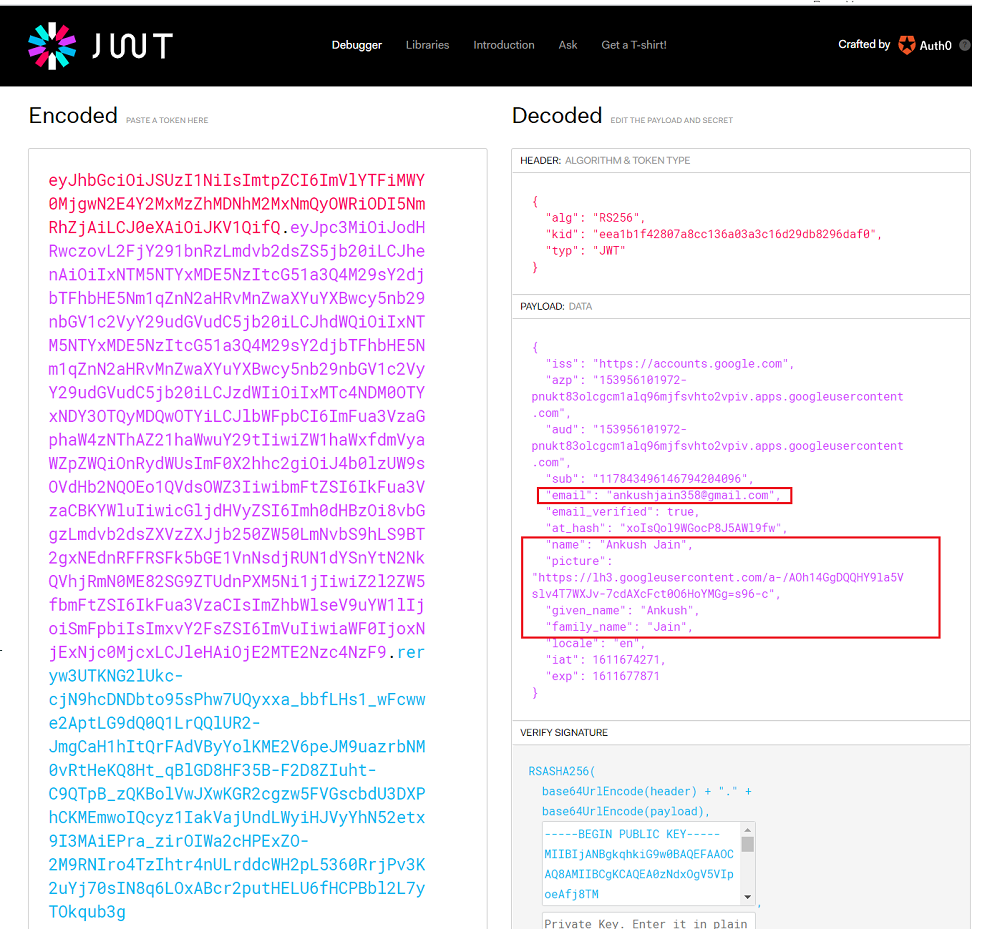
Copy id_token and paste it on jwt.io to decode it. You can see that we have got the following claims in ID Token.
JWT is made of 3 things - {Header}.{Payload}.{Signature}. You can simply decode the base64 encoded payload in any language. For example, in JavaScript, you can use window.atob('encoded-payload').
The final step is validating an ID token. Though we have received it directly from Google, still it is a good practice to validate the ID Token before we consider it genuine. Below are certain things that we must verify while validating an ID Token.
jwks_uri key of the Discovery document.iss (issuer) claim in ID token is either https://accounts.google.com or accounts.google.comaud(audience) claim value is the same as the Client Id of your app.exp claim has the value of expiry time that has not passed, and the token is still active.In this post, we understood how we could get the user's identity in form of an ID Token. We have not used any third-party library or wrapper in this implementation to better understand how Open ID authentication actually works. After successful authentication, we obtain the user's email id in the claims and can use it to create a new user or login into the user automatically if exist already.