Disclaimer: I am a consultant at Amazon Web Services, and this is my personal blog. The opinions expressed here are solely mine and do not reflect the views of Amazon Web Services (AWS). Any statements made should not be considered official endorsements or statements by AWS.
In this post, we will learn how to secure Web APIs by implementing Token Based Authentication & Authorization in them. You can refer this post to understand what is Authentication & Authorization in web applications.
Basically, there are two most common methods for Authentication in Rest Based services.
You can refer this link to understand the Basic Authentication. In this post, we will only concentrate on implementing Token Based Authentication in Web API.
Note that there are several ways to implement token-based authentication. Currently, I am aware of two types of tokens.
In this post, we will learn about the implementation of OWIN Based tokens. So let's begin the game.
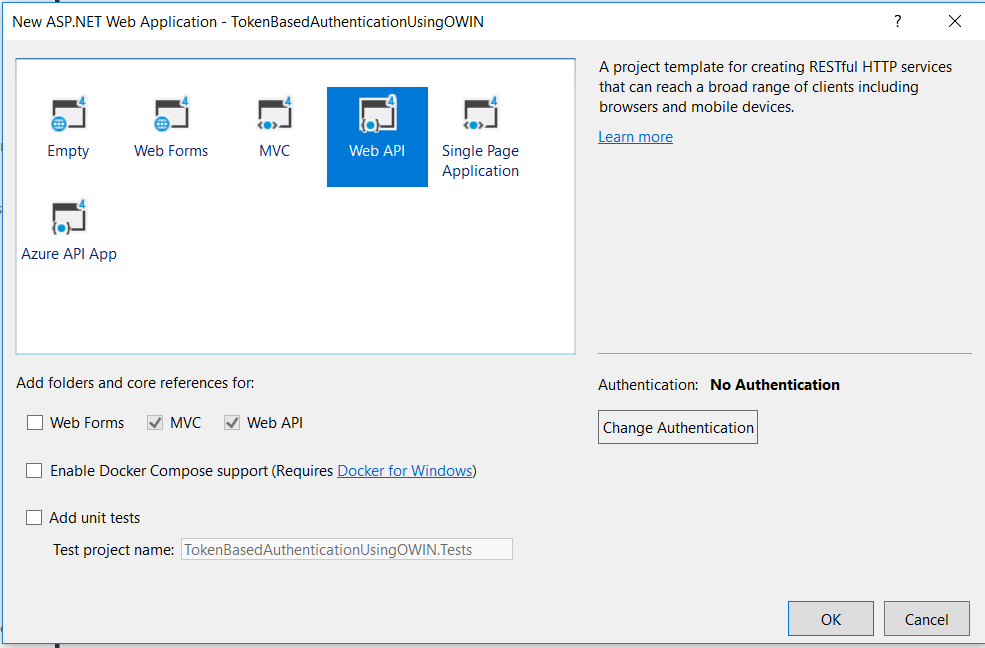
Step 1: Create a new web application project in Visual Studio.
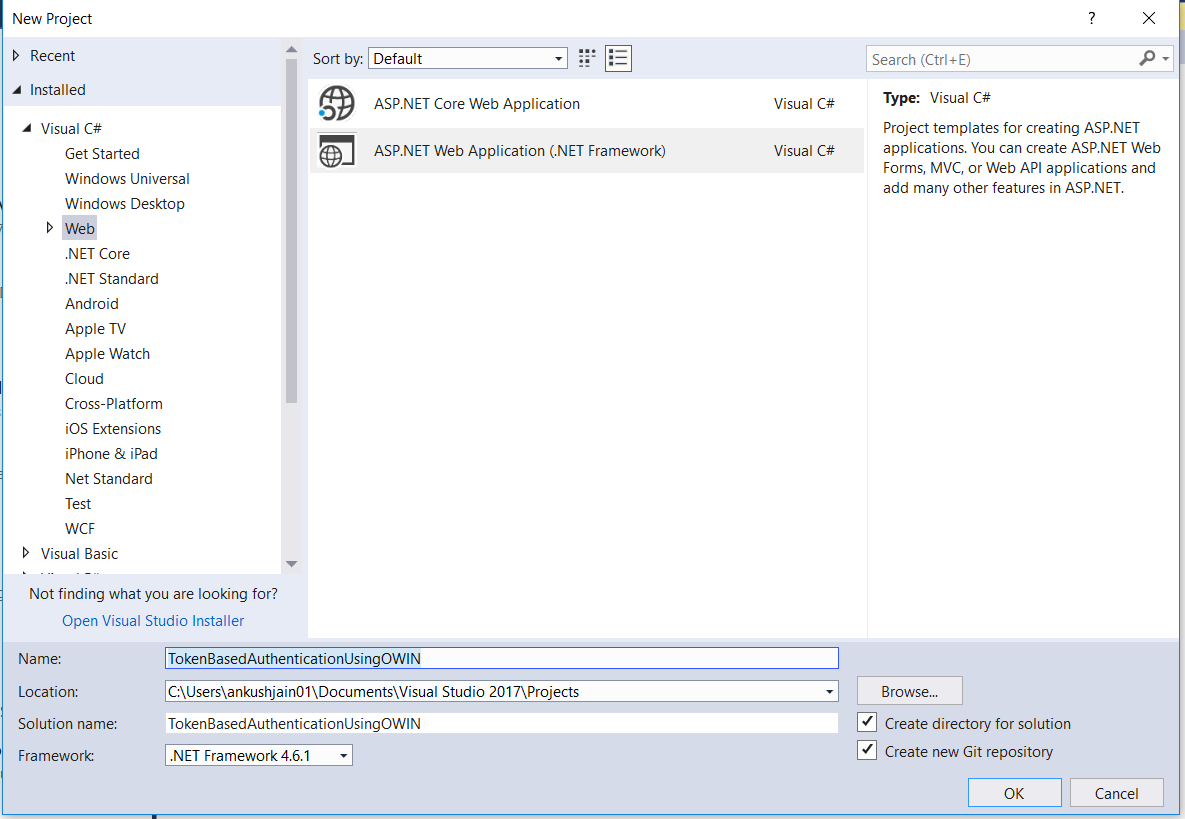
Step 2: Select Web API project template.
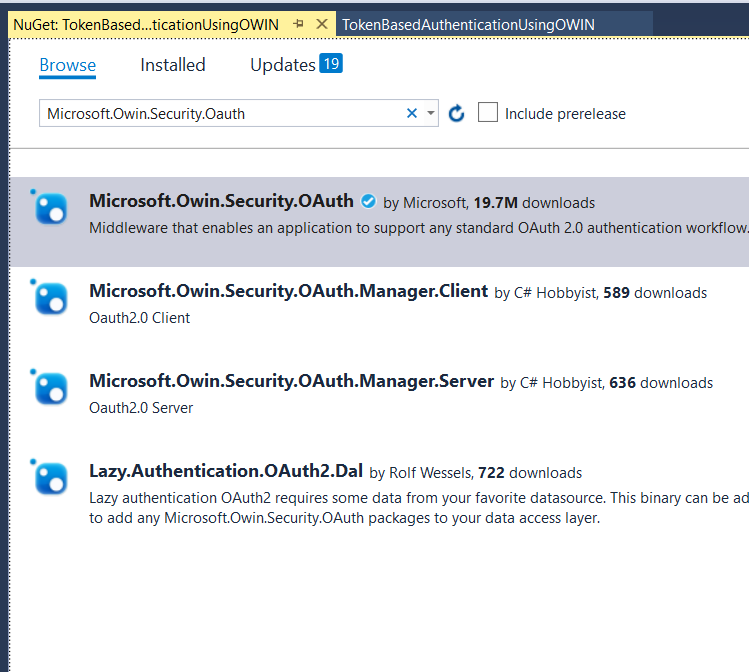
Step 3: Install this Nuget package - Microsoft.Owin.Security.OAuth. This package is a Middleware that enables the application to support OAuth 2.0 authentication workflow. This package is responsible for generating auth token, validating the token in ASP.NET pipeline & setting up User's identity.
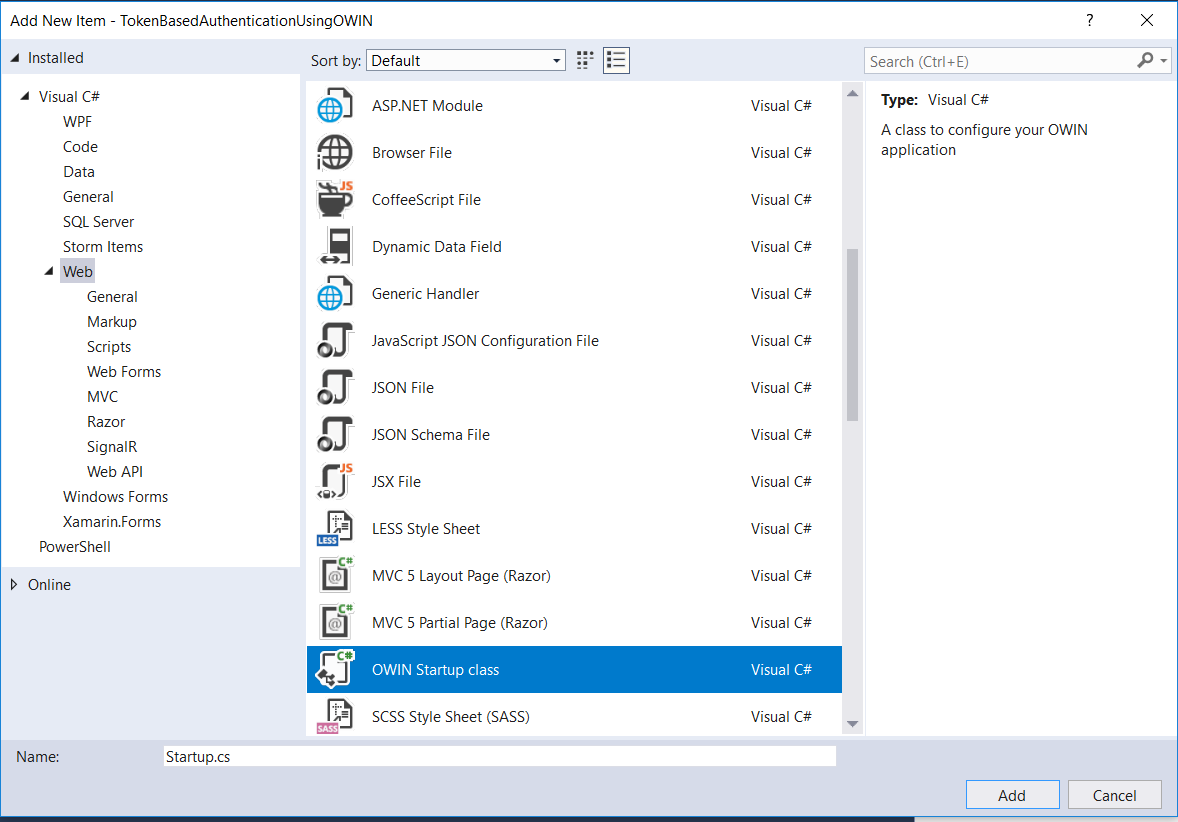
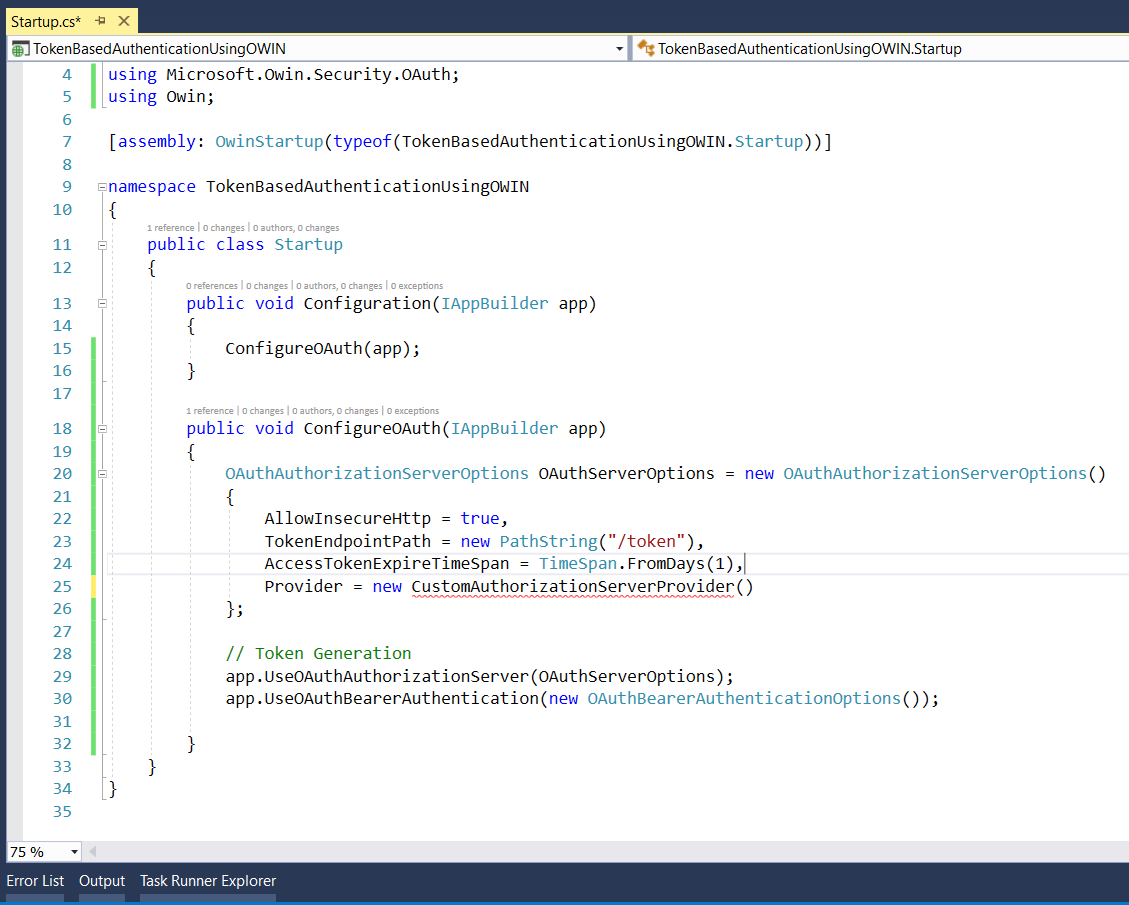
Step 4: Now, create an OWIN Startup class. In this class, we will write the code to register the OWIN middleware. Name it StartUp.cs.
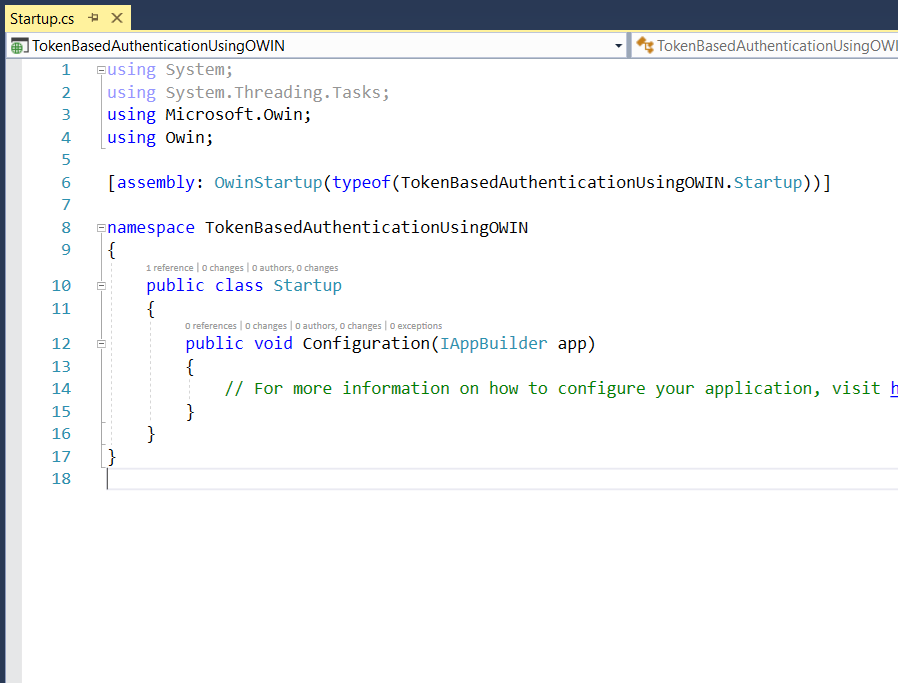
Step 5: Startup class will look like this initially.
Step 6: Now copy the below code in StartUp.cs file to configure OAuth (Token Based Authentication) using OWIN Middleware. Here we registering OWIN OAuth Middleware in the application so that it can be part of the request pipeline.
After, copying the above code, your file will look like this.
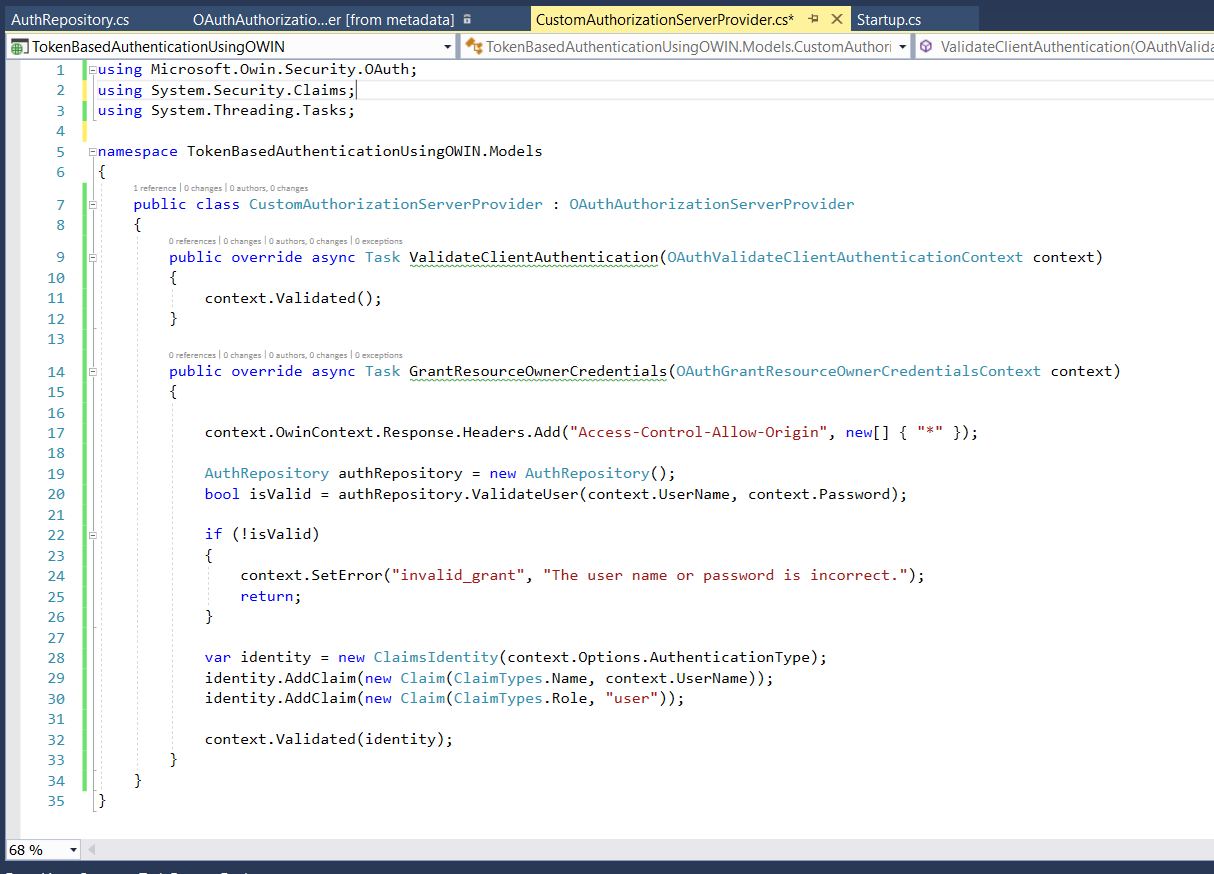
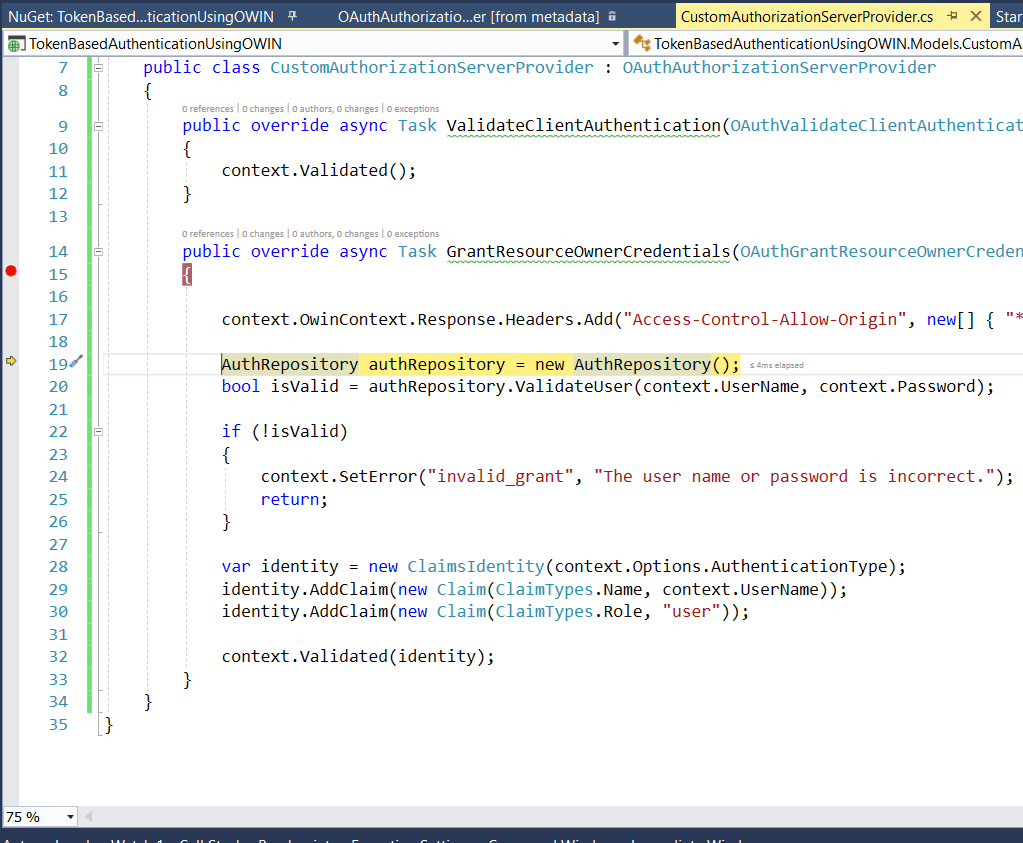
Step 7: Now implement CustomAuthorizationServerProvider class. This is the class in which, we will be validating the user's username & password. This is purely a custom class. We can write a custom logic here to validate a user's credentials. We are not using ASP.NET Identity here.
The file will look like this.
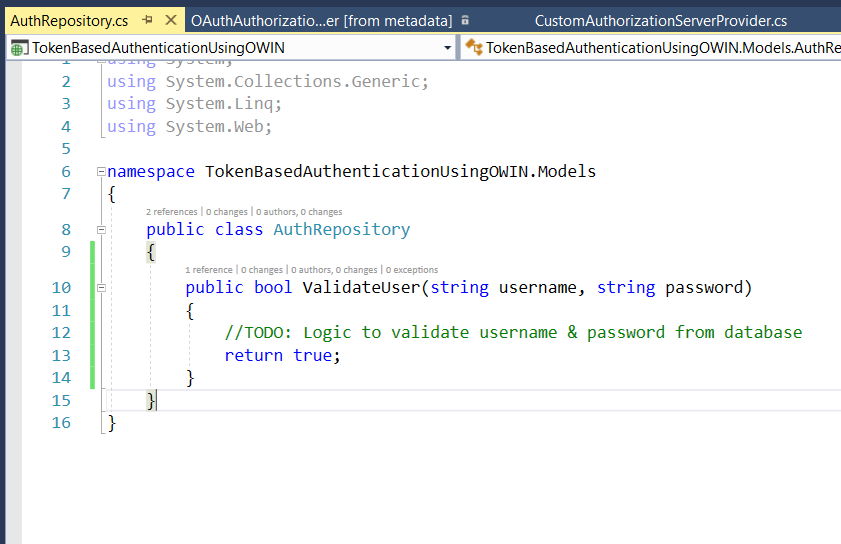
Step 8: This is a demo class I have used in this example. Here, you will be validating the user's credentials from your application's database.
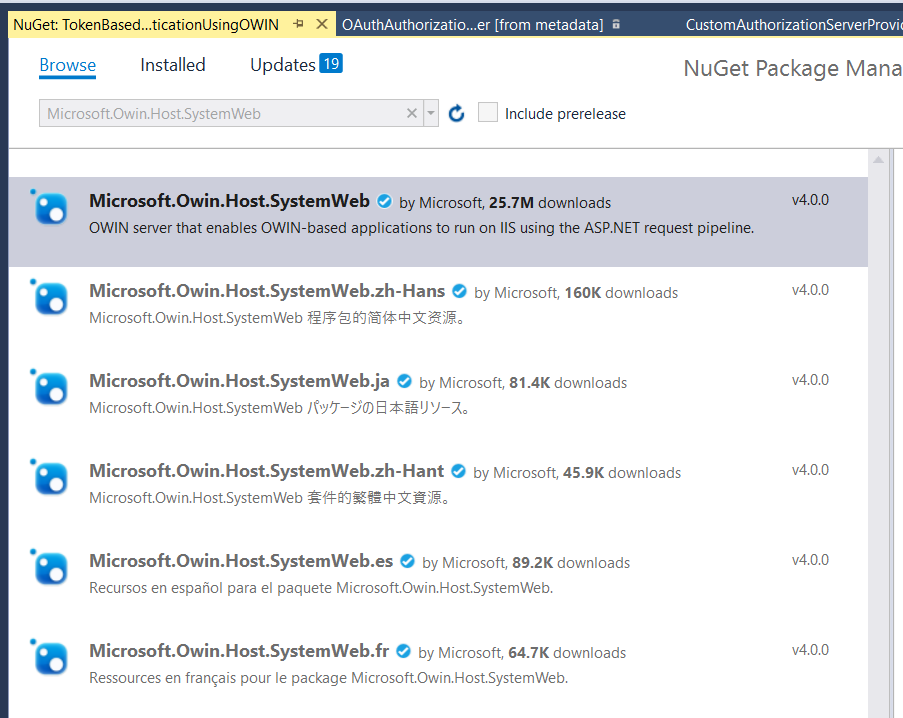
Step 9: Now add this Nuget package. If you don't add this, then your StartUp.cs file won't be executed. So just install the Nuget package - Microsoft.Owin.Host.SystemWeb.
Step 10: Build the application to ensure there is no compilation error. Once the build is successful, press F5 to launch the application. You will see the application like below in your web browser.
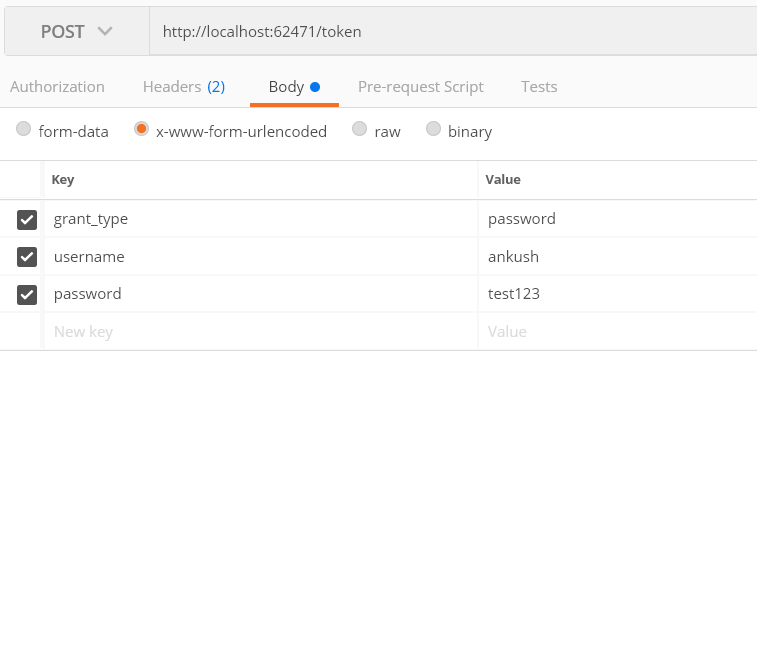
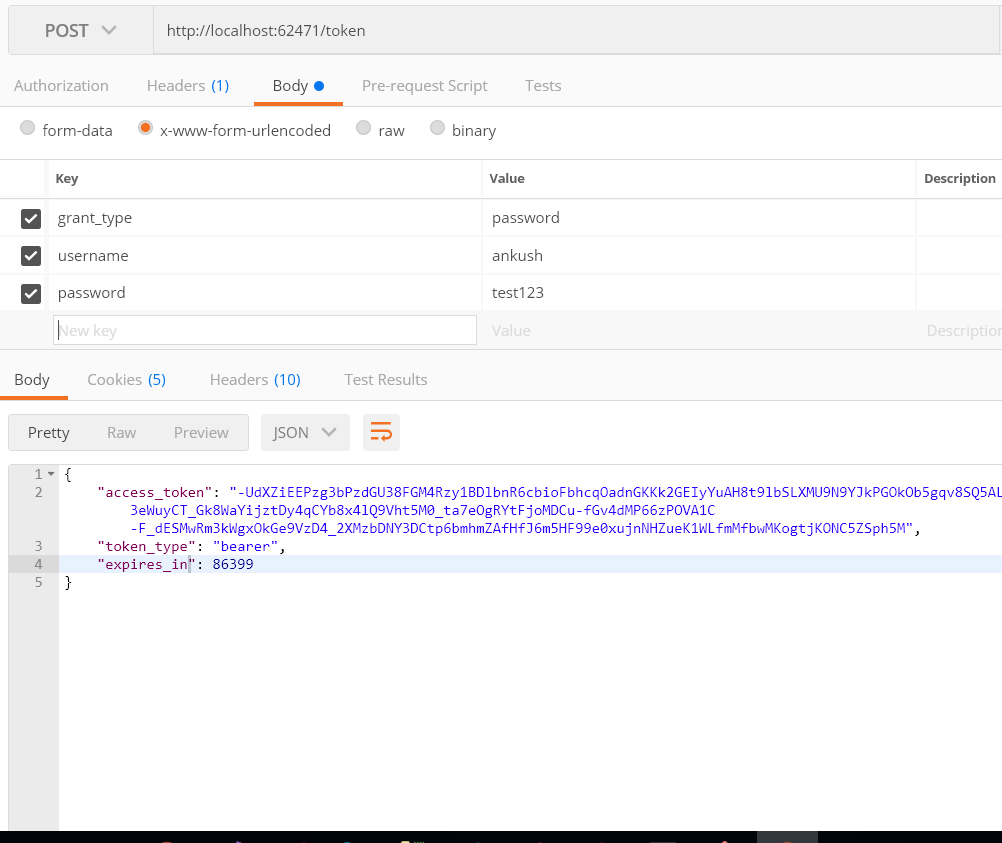
Step 11: Now, it's time to generate the Access Token. Open postman & fill in the information like the below image.
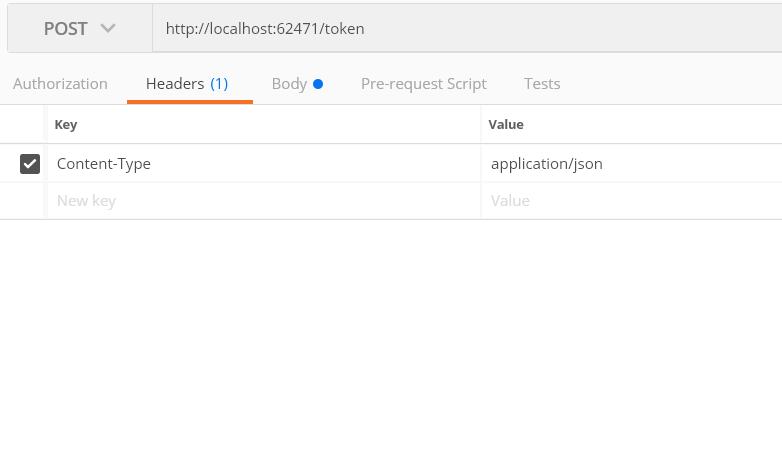
Step 12: Also, make sure to set Content-Type to application/json. This is because we explicitly tell the browser to send the response in JSON format.
Note: This may not be the necessary step, but I just did it.
Step 13: Once you hit execute button in postman, you will see that your breakpoint in GrantResourceOwnerCredentials will get hit. In this method, you will verify the user, set his claims. OWIN will take care of the information which you have shared with him. And it will then generate the token from all this information when context.Validated(identity); will be called.
Step 14: Now just look at the response in postman. You will see that we have received the access token in the response.
You can access the whole source code from GitHub -https://github.com/ankushjain358/TokenBasedAuthenticationUsingOWIN.